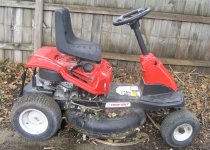
I'm trying to find a repair manual for the B&S 21R7070039 engine on my Troy Built Series 26J Mini-Rider lawn tractor.
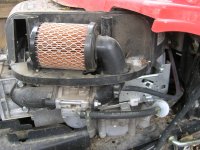
Specifically I need to remove and clean and reinstall the Nikki carburetor.
It appears that two nuts on long bolts hold the carburetor body to the plastic intake manifold.
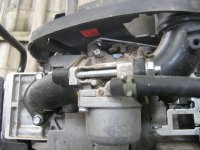
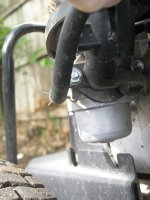
There is a gravity feed fuel line on the right side of the the carburetor body held in position by a spring clamp.
There is another line (a fuel return line or EGR line?) that goes into the front of the carburetor body.
There has to be a throttle line attachment and maybe a solenoid and wire connector for a solenoid at some location.
From the little I have been able to read (official service manuals - not reprints - of any kind seem hard to find on the internet), the gaskets, O-rings, etc., seem to be very finicky and non-reusable. That means that if you accidentally remove such a thing, you are obligated to buy the whole repair kit - not inexpensive.
The last time that I ran the lawn tractor it ran OK. However, even with SeaFoam gas treatment, after two years, the needles valves are probably stuck shut and gasoline carburetor cleaner does not seem to help.
That means that I probably have to get the carburetor off and at least get carburetor cleaner on the throat surfaces, or maybe soak the carburetor.
If I had an ultrasonic cleaner, I could just dunk it in the tank and let it run for several hours. But I don't. Mine broke some time ago.
So it's manual methods, and learning as much as possible before starting.
Also, is the float (assuming that there is one) hollow plastic, hard foam plastic, or metal? Some float types tend to get fuel logged and have to be/should be replaced.
I've also not dealt with a carburetor for a small engine that has - could have - a solenoid. What complications does that add?
So, back to the original, easier to take care of way to respond to this request: Where do I find a good, detailed service manual?
Thanks for any help.
Specifically I need to remove and clean and reinstall the Nikki carburetor.
It appears that two nuts on long bolts hold the carburetor body to the plastic intake manifold.
There is a gravity feed fuel line on the right side of the the carburetor body held in position by a spring clamp.
There is another line (a fuel return line or EGR line?) that goes into the front of the carburetor body.
There has to be a throttle line attachment and maybe a solenoid and wire connector for a solenoid at some location.
From the little I have been able to read (official service manuals - not reprints - of any kind seem hard to find on the internet), the gaskets, O-rings, etc., seem to be very finicky and non-reusable. That means that if you accidentally remove such a thing, you are obligated to buy the whole repair kit - not inexpensive.
The last time that I ran the lawn tractor it ran OK. However, even with SeaFoam gas treatment, after two years, the needles valves are probably stuck shut and gasoline carburetor cleaner does not seem to help.
That means that I probably have to get the carburetor off and at least get carburetor cleaner on the throat surfaces, or maybe soak the carburetor.
If I had an ultrasonic cleaner, I could just dunk it in the tank and let it run for several hours. But I don't. Mine broke some time ago.
So it's manual methods, and learning as much as possible before starting.
Also, is the float (assuming that there is one) hollow plastic, hard foam plastic, or metal? Some float types tend to get fuel logged and have to be/should be replaced.
I've also not dealt with a carburetor for a small engine that has - could have - a solenoid. What complications does that add?
So, back to the original, easier to take care of way to respond to this request: Where do I find a good, detailed service manual?
Thanks for any help.