Almost hydro-locked from a fuel leak

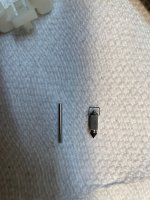
You need a very small finishing nail and a medium screwdriver handle to use for a soft hammer. Look at the pin carefully and you will see one end has a dimple because it is flared for a tight fit. The other side is flat. Place the small finishing nail (or a tiny pin punch) against the smooth flat end of the pin. Gently tap the pin and it will free up and move out.

Make sure to put the pin back in the same direction. (Mark the dimpled end and aluminum with a permanent marker for reference.)

Do not get too aggressive trying to remove the pin.

Once the pin is out the float and needle will lift right up. Pay attention to how the needle is attached to the float.

Let us know how you progress.

After a light cleaning, reassemble in the reverse order.
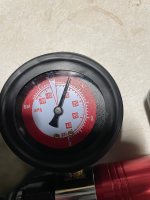
 
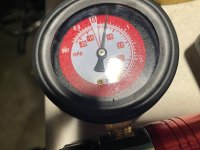
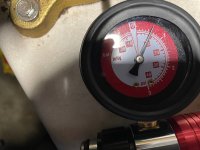
So I put a vacuum tester on the original carb for 25 minutes. Pumped to 8psi and at the 25 minute mark it had dropped to just under 6 psi. The carb body was mounted in a vice to keep it perfectly level during testing

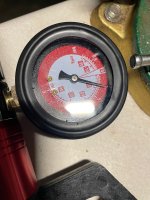
Just for the heck of it, I took the new carb and repeated the test for the same duration. On both tests I was sure to use new fuel line with clamps to prevent leakage. Again, the carb was clamped in a vice. After 25 minutes, the pressure dropped to 7.75 psi. Barely noticeable. I'll post pics of both tests later.

Does it sound like the original carb is ok? I haven't removed the float yet.
 
So I put a vacuum tester on the original carb for 25 minutes. Pumped to 8psi and at the 25 minute mark it had dropped to just under 6 psi. The carb body was mounted in a vice to keep it perfectly level during testing

Just for the heck of it, I took the new carb and repeated the test for the same duration. On both tests I was sure to use new fuel line with clamps to prevent leakage. Again, the carb was clamped in a vice. After 25 minutes, the pressure dropped to 7.75 psi. Barely noticeable. I'll post pics of both tests later.

Does it sound like the original carb is ok? I haven't removed the float yet.
7psi is all you need. If it holds 8, fine. Just test at 7psi.

You are seeing drops in both carbs. A drop is a drop. Leak is a leak. Fail in my book. It either holds or not. Timed leaking is just a slow leaker. Probably needs the next paragraphs below.

TIP, the carb needle/seat needs to be WET. Spray some PB Blaster penetrating oil on the needle or into the fuel inlet to the carb body.

OR better yet carb bowl on carb normal side up. Use a clear fuel line you can see through and fill the hose/carb bowl with fuel. Fill the hose till she stops taking fuel. Mark the fuel line then hit the timer. This latter test simulates REAL working conditions. Come back here with your results.
 
Last edited:
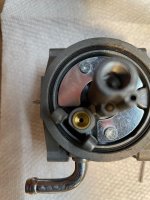
I did manage to get the float/needle assembly out thanks to Auto Doc's tip so I have a good look at the valve needle. The tip of the needle seems to have a rubber coating on it. It appears to be intact, no rips or tears or signs of wear but it could've shrunk from being stored in a dry condition. But I didn't wet it, which I'll try next. (Just a little shot of PB Blaster to dampen the rubber.) The seat is brass with no insert that looks removeable. The seat looked perfectly clean, no debris or residue. When I get the pix posted you'll see a little better what I mean. I'll try wetting the rubber on the needle tip and see if there's a change in the pressure drop. Pics are tough for me to post so it'll be awhile before those show up.

I do have some clear line that came with the testing kit so I'll use that for the real world test. Is it best to use fuel or will water work just as well?
 
Is it best to use fuel or will water work just as well?
Real world. Use E-0 unleaded if at all possible.

Doesn't take much for that rubber tip to distort, dry out and or not seal.

Should be a perfect conical pointed tip. If you can see where it has been sitting, she has wear.
 
I did manage to get the float/needle assembly out thanks to Auto Doc's tip so I have a good look at the valve needle. The tip of the needle seems to have a rubber coating on it. It appears to be intact, no rips or tears or signs of wear but it could've shrunk from being stored in a dry condition. But I didn't wet it, which I'll try next. (Just a little shot of PB Blaster to dampen the rubber.) The seat is brass with no insert that looks removeable. The seat looked perfectly clean, no debris or residue. When I get the pix posted you'll see a little better what I mean. I'll try wetting the rubber on the needle tip and see if there's a change in the pressure drop. Pics are tough for me to post so it'll be awhile before those show up.

I do have some clear line that came with the testing kit so I'll use that for the real world test. Is it best to use fuel or will water work just as well?
I know from years of experience using a handheld vacuum pump, you need to verify the pump itself is actually holding a steady vacuum for a minimum of 10 minutes. New does not matter, it must be verified.

The rubber tip on the is a VITON rubber coating which resists fuel damage.

For the seat area, use a Q-tip and twirl it around good to polish and clean where the needle tip sits.

Hope this helps you.
 
Will do. Tip had no wear marks when examined under a magnification lamp.

I will verify the pump also. Thanks!
 
Here's the pics of the vacuum test. First two are of the original carb. Next two are of the new carb. Then the seat and the needle.pressure a.JPGPressure b.JPGPressure c.JPGPressure d.JPGSeat.JPGNeedle 2.JPG
I checked the pump seal and it held a steady pressure for 15 minutes.
 
Last edited:
So going forward I suggest you install a fuel shutoff in your gas line. It’s a few $ of prevention.

I always shutoff the fuel cut off and run the engine dry. Don’t forget to turn the key off, if you forget, you will probably have a dead battery next time you need it……..don’t ask how I know……..

Any carburetor may develop a leak and possibly cause a fire, fill crankcase oil, or hydro lock the cylinders.

This is just a safety measure that I utilize
 
Back
Top