
You are using an out of date browser. It may not display this or other websites correctly.
You should upgrade or use an alternative browser.
You should upgrade or use an alternative browser.
Almost hydro-locked from a fuel leak
- Thread starter DHook
- Start date
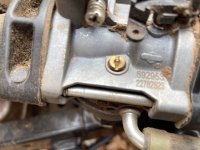
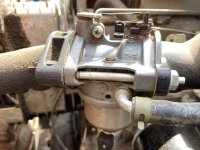
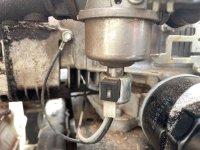
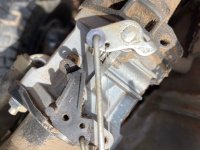
Here's some pix of mine still installed. Thanks for the video links. I'll look at those before taking off the old one. Hoping to save the needle/seat to reuse. I went ahead and ordered that Paneri one from Amazon, just in case I muck this one up and can't get it back on by the time I need the mower. Strangely enough, that's the one I saved when I went searching Amazon to see what they had for replacements. Thanks guys!
Auto Doc's
Lawn Addict
Avoid an aftermarket carburetor, if at all possible, 2 out of 3 are usually worse than what you already have and new OEM carburetors are expensive. I usually get parts from Part Tree or Jacks Small Engine. I am not a fan of Amazon, but I do use eBay pretty often.
Work slowly and take plenty of pictures for reference.
90% of the time, you just need to take the carburetor off and remove the fuel (anti-backfire) solenoid with a thin wrench and carefully tap the float bowl to remove it. Once removed, clean it good. Also check the solenoid for rust and sticking which is common. Clean the solenoid tip/pintle with carburetor spray and gently work it back and forth as you clean it.
Lay out a couple of paper towels inside of a soda crate box, then lay every part in an intentional pattern as you remove them. You don't have to take everything out or off the carburetor, just the important components.
Then remove the cross pin holding the plastic float and carefully remove the float. Watch how the needle is attached to the float because it will need to go back the same way. Clean the needle tip gently with a soft cloth and inspect it for any damage.
Next, you will need to inspect the seat area where the needle goes and use carburetor cleaner with a straw attachment to blow spray backwards from the seat area to the fuel inlet portion where the fuel line connects. This is the most common area for trash to get stuck and not allow the needle to fully seat.
If the needle seat is a tiny orange ring down inside the hole at the bottom, let us know, because those can be a real pain and you will need a special tool to replace it.
I have seldom had to order a carburetor kit unless something was really bad.
Assembly is just a reverse of disassembly. Be careful not to overtighten or force anything. Patience is your best approach.
Attach some digital pictures if you can.
Let us know how you progress on this new adventure.
Teryl Fixes All has some good small engine carburetor videos for all kinds, so check out some of his videos for a similar one to yours.
Work slowly and take plenty of pictures for reference.
90% of the time, you just need to take the carburetor off and remove the fuel (anti-backfire) solenoid with a thin wrench and carefully tap the float bowl to remove it. Once removed, clean it good. Also check the solenoid for rust and sticking which is common. Clean the solenoid tip/pintle with carburetor spray and gently work it back and forth as you clean it.
Lay out a couple of paper towels inside of a soda crate box, then lay every part in an intentional pattern as you remove them. You don't have to take everything out or off the carburetor, just the important components.
Then remove the cross pin holding the plastic float and carefully remove the float. Watch how the needle is attached to the float because it will need to go back the same way. Clean the needle tip gently with a soft cloth and inspect it for any damage.
Next, you will need to inspect the seat area where the needle goes and use carburetor cleaner with a straw attachment to blow spray backwards from the seat area to the fuel inlet portion where the fuel line connects. This is the most common area for trash to get stuck and not allow the needle to fully seat.
If the needle seat is a tiny orange ring down inside the hole at the bottom, let us know, because those can be a real pain and you will need a special tool to replace it.
I have seldom had to order a carburetor kit unless something was really bad.
Assembly is just a reverse of disassembly. Be careful not to overtighten or force anything. Patience is your best approach.
Attach some digital pictures if you can.
Let us know how you progress on this new adventure.
Teryl Fixes All has some good small engine carburetor videos for all kinds, so check out some of his videos for a similar one to yours.

sgkent
Lawn Addict
Wiki says that is a genuine Briggs (it has the logo on it too) carb that is sold by Briggs with gaskets to replace the Nikki carb that was original to it. Just typing what Wiki says. Best guess is that the prior owner or someone in the chain of building it replaced the original Nikki or Ruixing carb with the generic substitute. Could have even been a shop that worked on it. Labor to rebuild the old carb may have been more than a replacement at the time.
Hey SloMo, re: the pix of gas cans, I have one exactly like the one of the left of the three in the picture you posted, except it's a 5 gallon. Bought it at an auction for $7 and it's been great. When we use our generator it means less trips to the gas station.
Auto Doc's: Good tips all, especially the one about the soda crate. Small parts can so easily get dropped/lost. I have just the right container to use. I'm going to try to repair the OEM carb first but I ordered the after-market from Amazon just in case. Having a spare is the Boy Scout in me. I do a lot of work on HP large format printers and the same approach is needed on those; slow and not force anything, Works very well.
Auto Doc's: Good tips all, especially the one about the soda crate. Small parts can so easily get dropped/lost. I have just the right container to use. I'm going to try to repair the OEM carb first but I ordered the after-market from Amazon just in case. Having a spare is the Boy Scout in me. I do a lot of work on HP large format printers and the same approach is needed on those; slow and not force anything, Works very well.
sgkent
Lawn Addict
If one looks at the Ruixing carb pictorial on any parts lookup, it not only looks identical, but it has the briggs logo icon on it in the same location as the photos. I would guess that rebuild kit might work but one would need to compare parts. Part 125B is the Ruixing carb and 121B the rebuild kit. Part number 594886. Happy hunting. example of parts diagram.
 www.partstree.com
Briggs & Stratton 331707-0115-B1 - Briggs & Stratton Vertical Engine Carburetors, Carburetor Overhaul Kits, Fuel Supply Parts Lookup and Diagrams | PartsTree
Find genuine OEM replacement parts and diagrams for the Carburetors, Carburetor Overhaul Kits, Fuel Supply for the Briggs & Stratton 331707-0115-B1 - Briggs & Stratton Vertical Engine
www.partstree.com
Took the carb off after cleaning surrounding area and no problems. Opened up the bowl and did a rudimentary suction test to begin with the old fashion way using a hose and sucking and putting tongue on hose to see if it held a little vacuum for a minute and it did. But not a definitive test, that's for sure. (Ordered a test kit from Amazon for tomorrow. https://www.amazon.com/dp/B0B1BPSZF...a339&sp_csd=d2lkZ2V0TmFtZT1zcF9kZXRhaWwy&th=1)
I was going to remove the float but the pins appear to be pressed in. Tried some gentle pressure with a sharp tool and not budging. Not enough standing proud to grap with pliers. Anyone run into this before? All the videos I watched showed the pin just dropping out when the carb was turned on its side.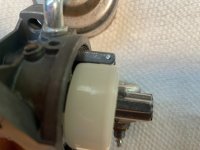
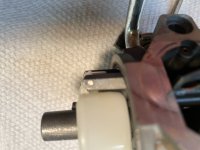
I was going to remove the float but the pins appear to be pressed in. Tried some gentle pressure with a sharp tool and not budging. Not enough standing proud to grap with pliers. Anyone run into this before? All the videos I watched showed the pin just dropping out when the carb was turned on its side.