Briggs 5HP IC Generator

Joined
Jul 22, 2017
Threads
21
Messages
2,154
Thanks Fish, but until I find very bad seats I dont plan to re-cut them.

bertsmobile1 It will just be for checking if I'm not sure they are seating correctly ... if I need to grind them for sure I have to buy the right thin as Boudreaux In Eunice La. suggested : Loctite clover. But I wait the valve removal, for now I see Loctite Clover Fin& Corse (280 & 120 Grit) @ 20$ + 20$ ship on eBay.

Mkala....... See if you can get it from Briggs in your area, it will be cheaper and it will be the right grit for your small engines....

The internet is full of different grits so you might not be ordering the right stuff.......

Plus tard Mon Ami ~!~!
 

bertsmobile1

Lawn Royalty
Joined
Nov 29, 2014
Threads
64
Messages
24,718
Fine will usually be all that is needed.
Valve grinding paste comes in a lot of different grades but most will be OK.
It is a lawnmower engine, not a F1 racer
With modern carbide valve seat cutters, no one uses coarse grit any more.
If you still are using the old stones to dress the valves & seats then you need to start with the coarse then go over to the fine as soon as you get a complete grey ring on both the valve & the seat.
Modern tooling like a Neway cutter will be OK to use without any lapping in a mower engine.

The important thing is that the paste is water so you can wash all of the grit & the grinding debris completely away.
 

Mkala

Well-Known Member
Joined
Jan 5, 2019
Threads
5
Messages
140
Ok thanks for information bertsmobile1 ! :smile:

Still wait on ma springs compressor, after I will be able to see the state of valve and seat, and decide if I have anything to to to them.
 

Mkala

Well-Known Member
Joined
Jan 5, 2019
Threads
5
Messages
140
Hi there,

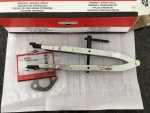
Received my tool to play with !
Its a bit less easy to use than what I think. The spring on exhaust side is strong, but once the tool is installed it easy to remove the in of the valve.
On the intake side spring is more soft, I was able to quickly remove the retainer without it... but will be helpful to re-installation of both !

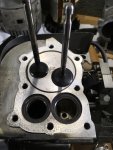
The valves looks nice, seats too. Don't plan to do anything on them except cleaning and adjusting lash.

IMG_2039_resized.jpg IMG_2040_resized.jpg


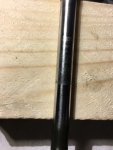
EDIT : intake valve and guide are fine, but I have some play on exhaust valve. Don't have the tool to check bushing, but I can see an feel some marks on the valve stem :
IMG_2041_resized.jpg
 
Last edited:

Romore

Well-Known Member
Joined
Jan 19, 2019
Threads
1
Messages
260
A little side to side play is normal, without it the valve will seize in the guide when the engine gets hot.
 

Fish

Lawn Pro
Joined
Aug 2, 2013
Threads
11
Messages
5,131
You ought to call around and see if a shop could cut the valves and seats cheaply if you brought in the block and valves, it may be done fairly cheaply.
 

Fish

Lawn Pro
Joined
Aug 2, 2013
Threads
11
Messages
5,131
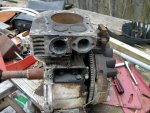
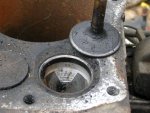
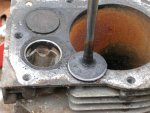
Here, I dug out a junk block. If I can find where I put my engine tools, I'll be lucky.

block 001.jpg
 

Fish

Lawn Pro
Joined
Aug 2, 2013
Threads
11
Messages
5,131
Here, I'll just look at the intake valve for now.
block 002.jpgblock 003.jpg
 

Fish

Lawn Pro
Joined
Aug 2, 2013
Threads
11
Messages
5,131
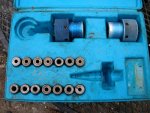
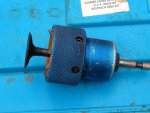
Well, I found my Neway valve cutting set. It came with the 30 and 45 degree head, and a wide assortment of guides for different valve stem sizes.block 004.jpg
 

Fish

Lawn Pro
Joined
Aug 2, 2013
Threads
11
Messages
5,131
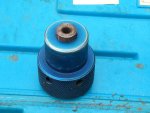
You get the correct size guide, and put it together like this. You have to clamp the end of the stem in a vice, protecting the valve with an old piece of fuel hose or something, and pulling and rotating the cutter to cut the valve.
This is an antique model, I think the have a fancier setup these days.

block 005.jpgblock 006.jpg
 
Top