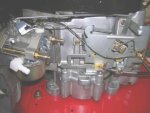
The GREAT Start Karel, the Craftsmand 42" Riding Lawn Tractor Caper

JCAllison

Active Member
Joined
Mar 21, 2012
Threads
5
Messages
59
  • / The GREAT Start Karel, the Craftsmand 42" Riding Lawn Tractor Caper
Hey All,
Saturday, March 20, 2019, Late-Mid-Afternoon Update:

Just got back from the Lawn Mower Shop, where Billy said that it would be about a month before he could get to fixing Karel. BUT, he did propose an alternative. He said that if I would remove and bring the Carburetor to him, that he would rebuild it in pretty short order, and then I would have to reinstall it.

So the question is: Am I capable of removing and re-installing the Carburetor?

We also discussed putting a NEW Fuel Line replete with a NEW Filter, AND a NEW Fuel Line Shut-Off Valve.

So the task now is figuring out HOW to remove the Carburetor.

Will let you know it goes, if and when it goes.

JC
 

Boobala

Lawn Pro
Joined
Feb 15, 2015
Threads
200
Messages
7,000
  • / The GREAT Start Karel, the Craftsmand 42" Riding Lawn Tractor Caper
Hey All,
Saturday, March 20, 2019, Late-Mid-Afternoon Update:

Just got back from the Lawn Mower Shop, where Billy said that it would be about a month before he could get to fixing Karel. BUT, he did propose an alternative. He said that if I would remove and bring the Carburetor to him, that he would rebuild it in pretty short order, and then I would have to reinstall it.

So the question is: Am I capable of removing and re-installing the Carburetor?

We also discussed putting a NEW Fuel Line replete with a NEW Filter, AND a NEW Fuel Line Shut-Off Valve.

So the task now is figuring out HOW to remove the Carburetor.

Will let you know it goes, if and when it goes.

JC

IF ... YOU are going to do this carb removal & replace, FIRST thing you need is your camera take pics (tons of em) of everything you do, it will become your re-assembly manual, especially any LINKAGES & SPRING connection points .. (see examples)

View attachment 43264..View attachment 43265..View attachment 43266..View attachment 43267..DSCN2449 (Medium).jpg..DSCN2477 (Medium).jpg..DSCN2603 (Medium).jpg..lmscarblinkage (Medium).jpg

Sometimes the pics DON'T display,.. just click on the attach. #
 
Last edited:

dfbroxy

Well-Known Member
Joined
Aug 31, 2017
Threads
18
Messages
258
  • / The GREAT Start Karel, the Craftsmand 42" Riding Lawn Tractor Caper
Go on youtube and search how to rebuild (your type motor and hp) carburator. Does not have to be exact hp. This will give you an idea how its done and what tools you will need. Watch it as many times as needed. After doing this I think you will be surprised how easy it will be for you. Also, the taking pics is a must!!!
 

JCAllison

Active Member
Joined
Mar 21, 2012
Threads
5
Messages
59
  • / The GREAT Start Karel, the Craftsmand 42" Riding Lawn Tractor Caper
IF ... YOU are going to do this carb removal & replace, FIRST thing you need is your camera take pics (tons of em) of everything you do, it will become your re-assembly manual, especially any LINKAGES & SPRING connection points .. (see examples)
Hey Mr. B,
Came back from seeing Billy, and he expected that I'd have the Carburetor to him in a couple of days. Little did he expect me to find this:

https://www.youtube.com/watch?v=5o4WzPxI5Ek

I walked back in to the Lawn Mower Shop with the Un-Installed Carburetor within an hour.

He was surprised! His comment was, "Could I start sending YOU my overflow business?"

He said the Carburetor would be ready in a couple of days.

Going to cost $28.00 + Parts. AND we're getting a NEW Fuel Line, a NEW Fuel Filter, and a NEW Shut Off Valve.

Without the above referenced Video, the Unit would have never come off. But, after having worked, since 1975 on Lorrie Van Haul (the last surviving 1967 Dodge P200 Post Office Vehicle out of 3,500 built), and since 1985 on Ms. American 3.14159 (the ONLY 1964 Ford Galaxie 500, Four-Door, Hard-Top, Fast-Back Police Interceptor that GOOGLE finds on the whole World Wide Web), this un&re-install of Karel's Carburetor is easy peasy.

Anyway, am going to be returning all the removed parts back to being pristine. Will let you know how every goes.

Everything happens when it's supposed to happen.

Take care everyone.

JC
 

bertsmobile1

Lawn Royalty
Joined
Nov 29, 2014
Threads
64
Messages
24,705
  • / The GREAT Start Karel, the Craftsmand 42" Riding Lawn Tractor Caper
If your fingers are not stiff & arthritic then the carb is easy to replace.
Get your parts book and mark off these items in order.
First pull off the fuel line at the carb and drain it into a container.
A pair of needle nosed pliers will make it easier to do.

Then from page 54 remove the air filter and then the trick screw , part # 224
Then the 2 nuts that hold the air filter housing on ( not shown )
The filter housing , part # 875 then slides off the studs towards the back of the mower.
It has a red rubber seal, part # 537 that might be stuck on the carb or remain in the channel in the filter housing.
You will now see 2 smaller nuts, the rear one is difficult to get at but they are not done up very tight.
Before you undo them pull the wires to the solenoid on the bottom of the carb off.
Now undo the two nuts
Some times the entire stud will come out, don't worry about that it makes no difference.
Now the trick roll the carb right to left so that the choke rod, part # 216, page 55 slides out of the slot in the throttle housing part # 222.
Unhook it from the carb and slide it back into the housing so you don't loose it.

This leaves the carb hanging on by the throttle rod . part # 201 & the spring part # 232
The spring has to come off first and tweezers are the right tool, just lift & twist, if it bends a little do not worry about it.
Now you roll the carb . top to bottom to slide it off the bend in the end of the throttle rod # 201 and you are all done

A fair bit ( about 3oz) of fuel will spill out of the carb during this preceedure so put some rag under it & if your skin is sensitive to fuel wear a pair of gloves.

Be careful with the spring # 232 as it is very thin & usually ends up stuck in your finger so use the tweezers.
 

JCAllison

Active Member
Joined
Mar 21, 2012
Threads
5
Messages
59
  • / The GREAT Start Karel, the Craftsmand 42" Riding Lawn Tractor Caper
If your fingers are not stiff & arthritic then the carb is easy to replace.
Get your parts book and mark off these items in order.
First pull off the fuel line at the carb and drain it into a container.
A pair of needle nosed pliers will make it easier to do.

Then from page 54 remove the air filter and then the trick screw , part # 224
Then the 2 nuts that hold the air filter housing on ( not shown )
The filter housing , part # 875 then slides off the studs towards the back of the mower.
It has a red rubber seal, part # 537 that might be stuck on the carb or remain in the channel in the filter housing.
You will now see 2 smaller nuts, the rear one is difficult to get at but they are not done up very tight.
Before you undo them pull the wires to the solenoid on the bottom of the carb off.
Now undo the two nuts
Some times the entire stud will come out, don't worry about that it makes no difference.
Now the trick roll the carb right to left so that the choke rod, part # 216, page 55 slides out of the slot in the throttle housing part # 222.
Unhook it from the carb and slide it back into the housing so you don't loose it.

This leaves the carb hanging on by the throttle rod . part # 201 & the spring part # 232
The spring has to come off first and tweezers are the right tool, just lift & twist, if it bends a little do not worry about it.
Now you roll the carb . top to bottom to slide it off the bend in the end of the throttle rod # 201 and you are all done

A fair bit ( about 3oz) of fuel will spill out of the carb during this preceedure so put some rag under it & if your skin is sensitive to fuel wear a pair of gloves.

Be careful with the spring # 232 as it is very thin & usually ends up stuck in your finger so use the tweezers.
Hey Mr. B,
All of this was done a bit earlier in the day. The Carburetor came out quite easily, and was delivered to Billy at the Lawn Mower Shop (as reported earlier). Am confident that it will all go back together as easily. Will just have to wait and see. Thanks for the details of the procedure. It will be a few days before the Carburetor is scheduled to be back.

Today will be almost totally occupied with a trip to the Clinic for health reasons. But the other items on today's agenda involves the cleaning of all the removed parts.

Will keep you all updated if, when, and as progress occurs.

Take care.

JC
 

JCAllison

Active Member
Joined
Mar 21, 2012
Threads
5
Messages
59
  • / The GREAT Start Karel, the Craftsmand 42" Riding Lawn Tractor Caper
Hey All,
Have just finished un-installing Karel's Gas Tank.

Have started draining Karel's Oil. The occasion is such that the draining can be left in progress till the Carburetor is returned from Billy at the Lawn Mower Shop.

Is there reason to clean out the Oil Sump somehow? If there is, what is the recommended procedure?

Have spent much of the morning cleaning the Air Filter Housing and all the parts that had to be removed to un-install the Carburetor. Everything looks really nice.

Would like to remove the Ignition Switch to clean the Spade Connectors. Did that some time ago, but don't remember how to remove it. Will have to figure that out again as was done last time.

At this point, am awaiting the return of the Carburetor. Will keep you all updated if, when, and as progress occurs.

JC
 

JCAllison

Active Member
Joined
Mar 21, 2012
Threads
5
Messages
59
  • / The GREAT Start Karel, the Craftsmand 42" Riding Lawn Tractor Caper
Hey All,
Thought that it might be efficacious to get the materials and items to connect Karel's Gas Tank to the Carburetor, and in addition to a NEW Fuel Filter, wanted to get a Fuel Shut-Off Valve. So off Lorrie and I went to the Lawn Mower Shop. Walked into the establishment, and Billy said: "If you can hang in here for another twenty minutes, your Carburetor will be ready." So I got to watch a virtuoso Lawn Mower Mechanic work on the Carburetor. It looks GREAT! Got some more Fuel Line, and the aforementioned Fuel Filter, and Shut-Off Valve, and all I had to do is give Billy $65.11, and he let me leave without stopping me!

Am kind of over-done for the day, but we'll be out tomorrow installing the NEWLY rebuilt Carburetor, and then we'll see if Karel will run.

Will keep you all updated if, when, and as progress occurs. Will get some JPGs of the Installation.

Take care everyone.

JC
 

bertsmobile1

Lawn Royalty
Joined
Nov 29, 2014
Threads
64
Messages
24,705
  • / The GREAT Start Karel, the Craftsmand 42" Riding Lawn Tractor Caper
Try & find a spot for the tap on the fuel tank side of everything so whenever you need to service the filter or pump ( if you have one ) you just turn off the tap, makes life so easy.
 

JCAllison

Active Member
Joined
Mar 21, 2012
Threads
5
Messages
59
  • / The GREAT Start Karel, the Craftsmand 42" Riding Lawn Tractor Caper
Try & find a spot for the tap on the fuel tank side of everything so whenever you need to service the filter or pump ( if you have one ) you just turn off the tap, makes life so easy.
Hey Mr. B,
Was wondering where to put the Shut-Off Valve. Had decided, as you suggested, to put it between the Fuel Tank, and the Fuel Filter. Your suggestion confirms that THAT would be the logical place. Will be making up that Fuel Line this morning, along with cleaning the Gas Tank.

Another question: Valvoline 5W40 Racing Oil is used in Ms. American, the 1964 Ford Galaxie 500, and have a case of it. Would this be a suitable Oil to put in Karel? Have always used Pennzoil 30 weight. Can acquire THAT easily, but not as easily as the 5W40 that is already here on the Shelf.

Next question: What all is involved with tuning the Carburetor? It has only one Adjusting Screw. Is THAT all? Not anywhere near as as complex as an Autolite 4100, which has all kinds of adjustments that must be made.

Anyway, thanks for the response. Should have Karel all back together today, and will see if she will percolate. Will let you know how it goes, with JPGs.

JC
 
Top