Honda Commercial HRA216-SXA revival, lots of pics

freeloader700

Member
Joined
Apr 25, 2014
Threads
4
Messages
33
A green Honda would be interesting...I will take a look at the colors and see if something other than the charcoal catches my attention
 

freeloader700

Member
Joined
Apr 25, 2014
Threads
4
Messages
33
Alright did a bit yesterday, actually a little over an hours worth. Here are some before pictures of the rust spots on the topside that I will be cleaning up with a grinder using a combo of a grinding disk & wire wheel.


I found this other 10mm bolt holding the clutch cable cover. This shot is right under the rear axle. To get it out, I used a 10mm deep socket with a long swivel extension, from above through the gear lever hole.


All cleaned up now, I think this will be good enough for some good adhesion of the self-etching primer.


I marked out the area I am planning on cutting out


Its a little pitted but not too bad


As you can see, I still have not been able to get the clutch cable cover off even after removing that other bolt. What am I not seeing on how to remove it...is it just rusted and not able to move much or is there another sneaky bolt?
 
Last edited:

JDsLawnCare

Member
Joined
May 7, 2014
Threads
5
Messages
32
This is a fun thread, ill be watchin from the shadows:thumbsup:
 

freeloader700

Member
Joined
Apr 25, 2014
Threads
4
Messages
33
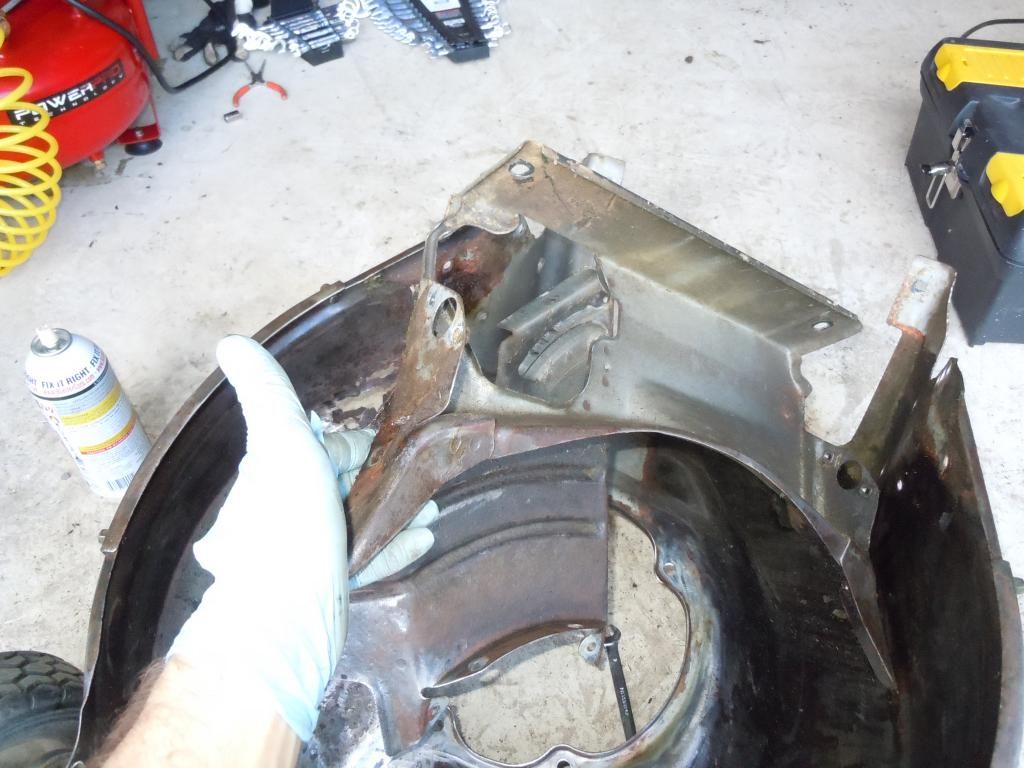
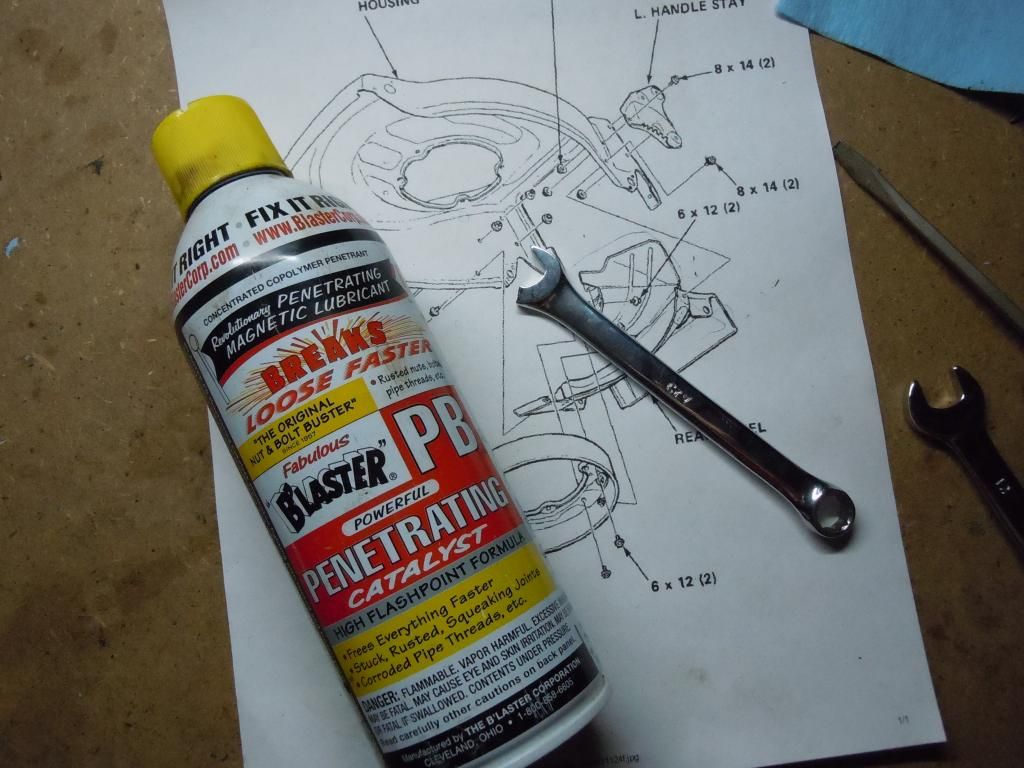
First I have to say, with something this old use some PB Blaster or Liquid Wrench, You will need it. I found out the hard way


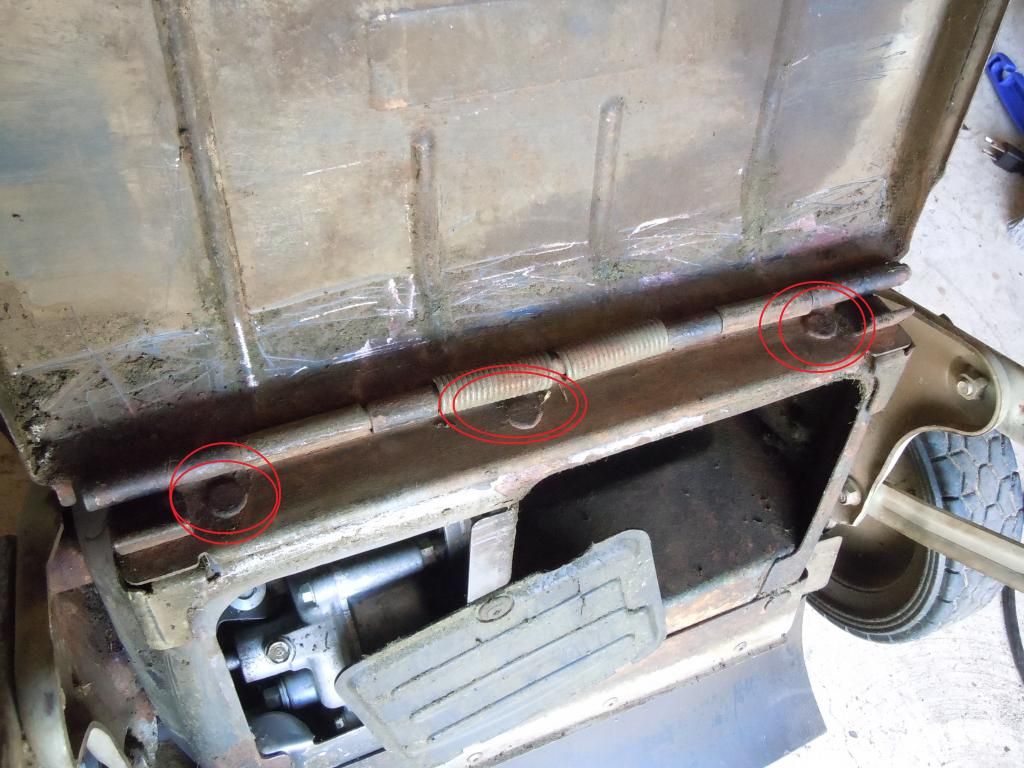
Alright, first up for tonight, removing the bag catch flap (not sure what it is technically called). There are 3 x 10mm nuts to remove, The threaded studs are circled in red


Then the plastic transmission cover,. 1 phllips scew


2 x 10mm bolt holding part of the guard to the deck next to the axle


Now, lets remove the drive cable from the transmission so we can remove the handlebars. There are 2 x 10mm thin nuts holding it into place. You can loosen one of them and slide it out of the bracket


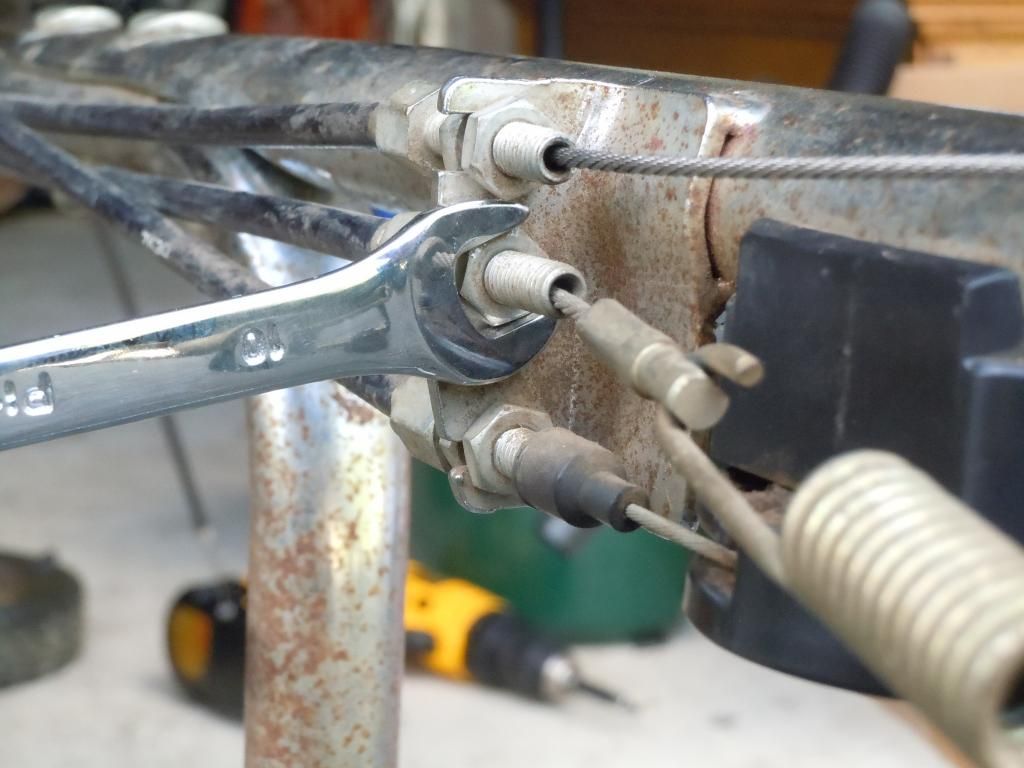
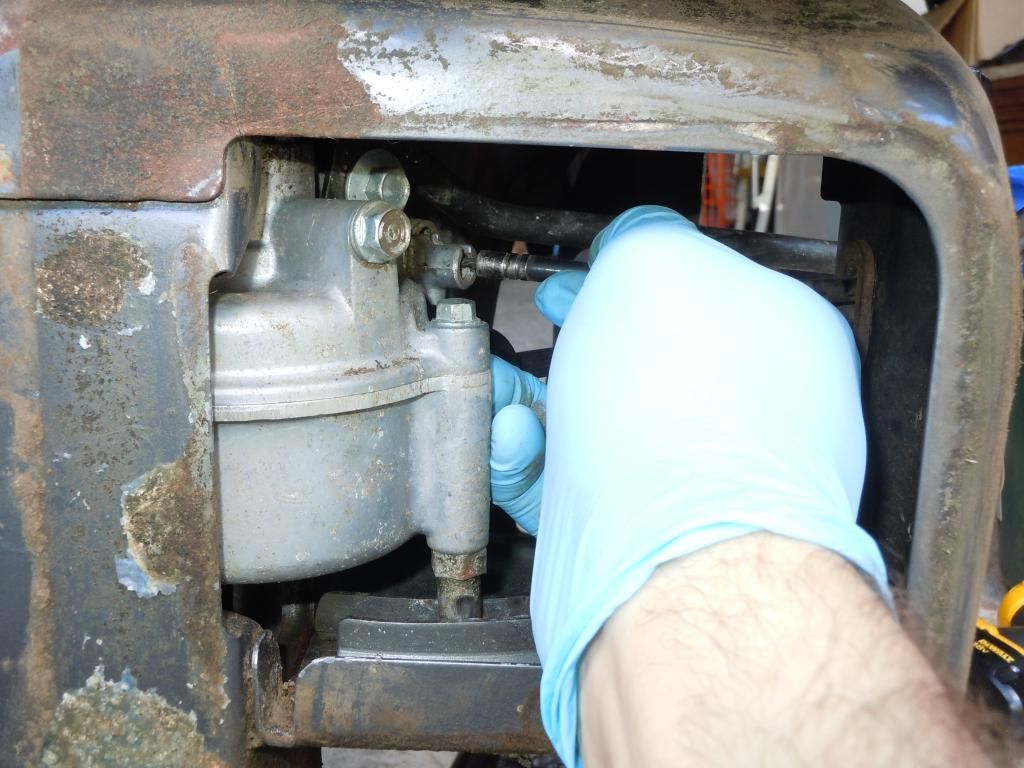
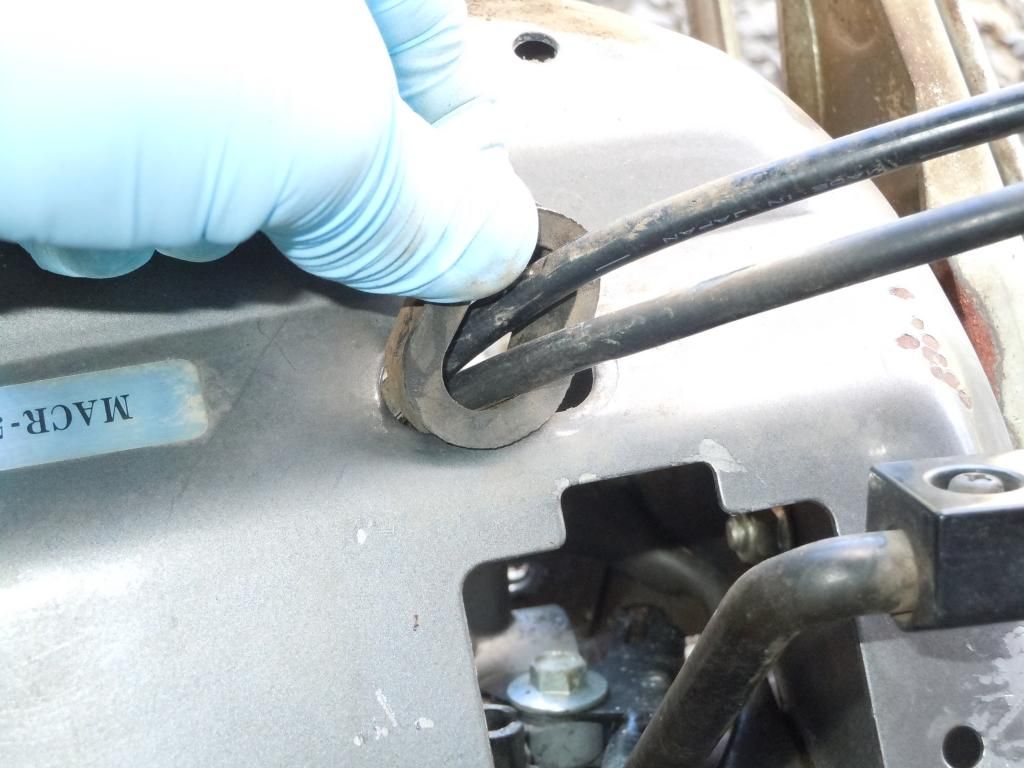
To remove the cable from the transmission, first pull the cable upward to release it from its catch. I accessed it through the hole after removing the plastic cover


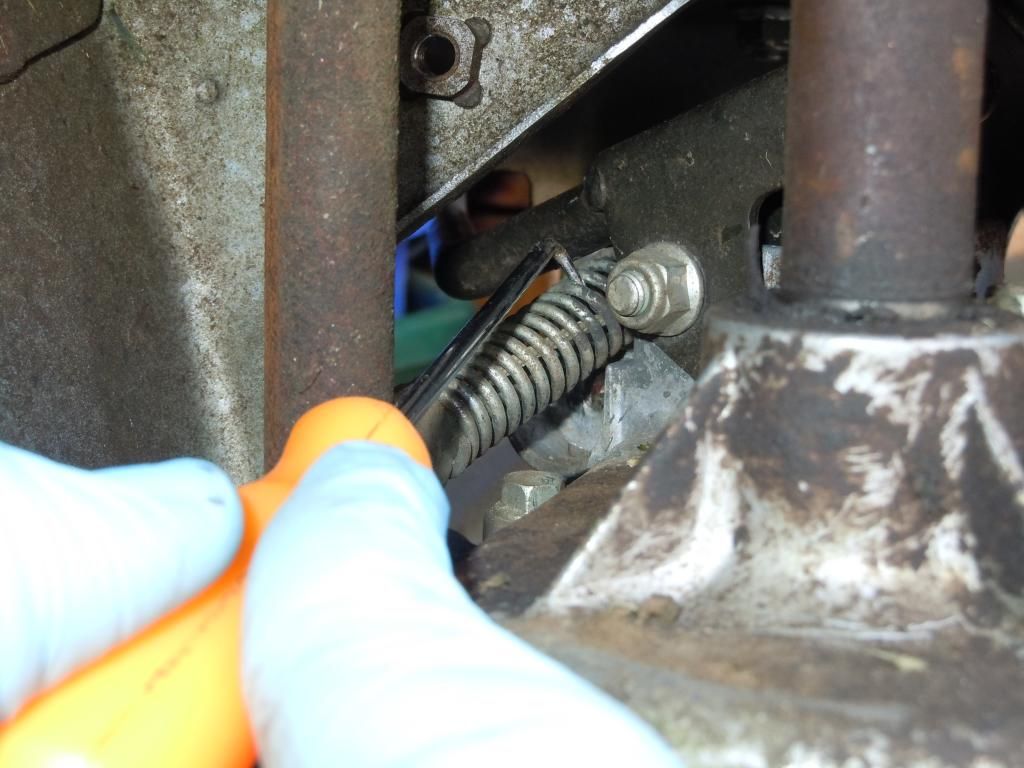
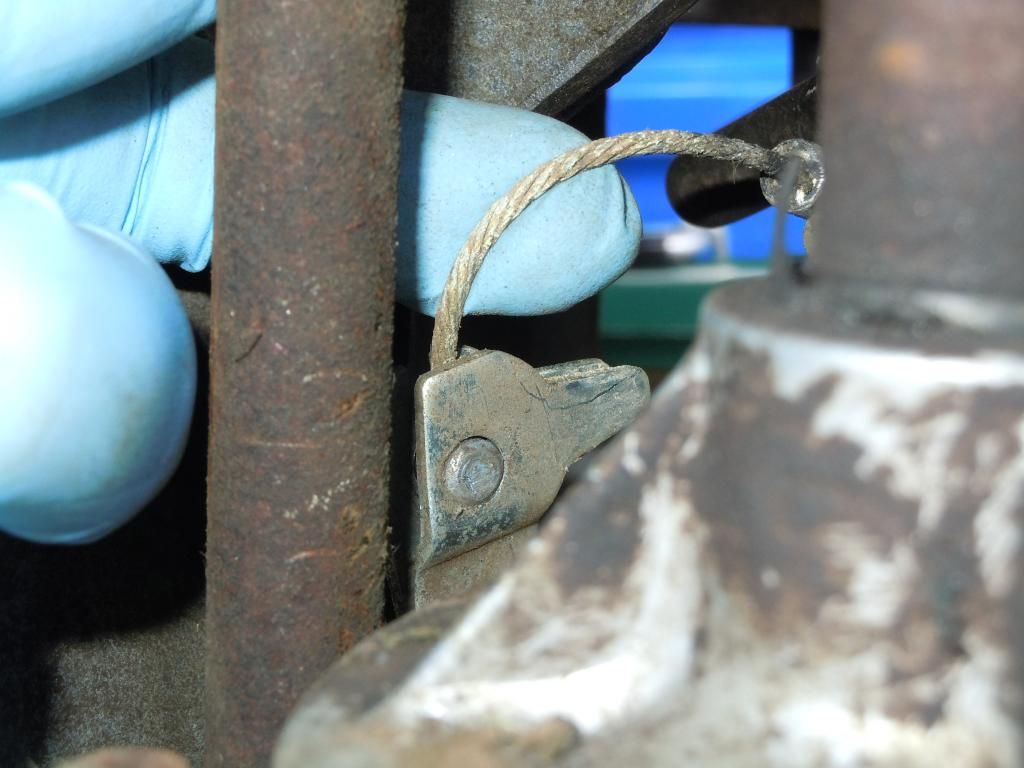
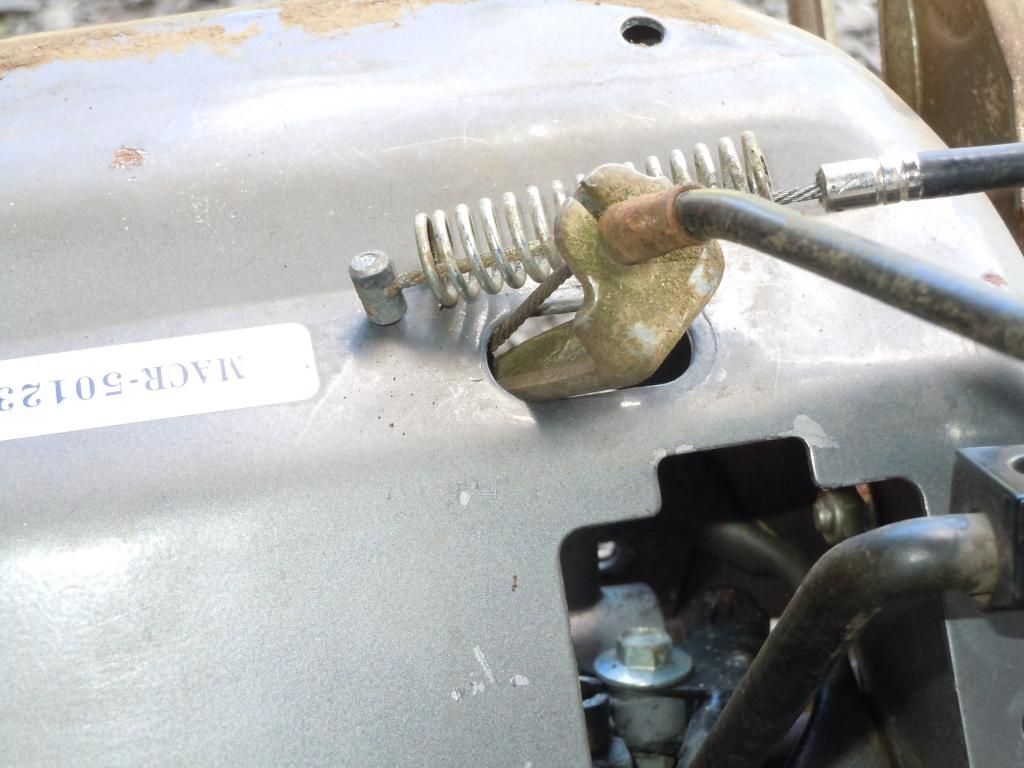
Then proceed from the bottom of the mower to access the drive cable spring, I used a hook, First pull the far side towards you to free it from its seat, Then slide the spring up the cable,


Now you can slide the cable through


Its not time to feed the clutch and drive cables through the deck, Simply push the rubber grommet up from underneath, The clutch cable will take a little bit of maneuvering to get it


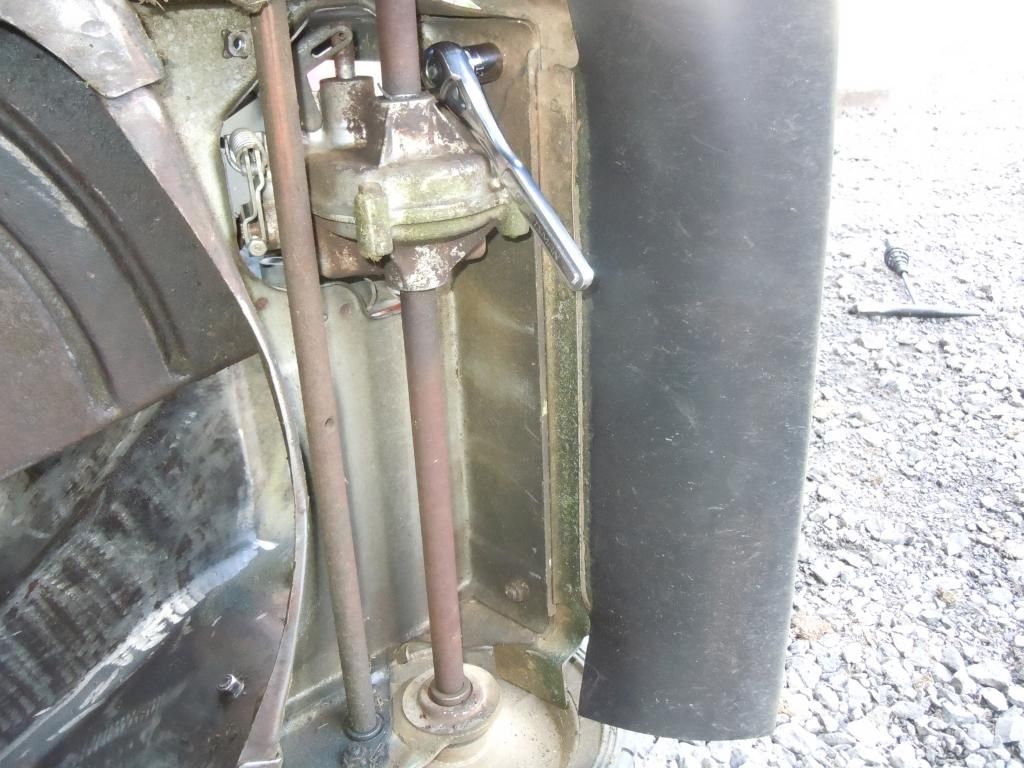
Now lets work on the handlebars. 2 x 12mm bolts on the outside and 1 x 12mm nut on the inside for the support bracketm per side.


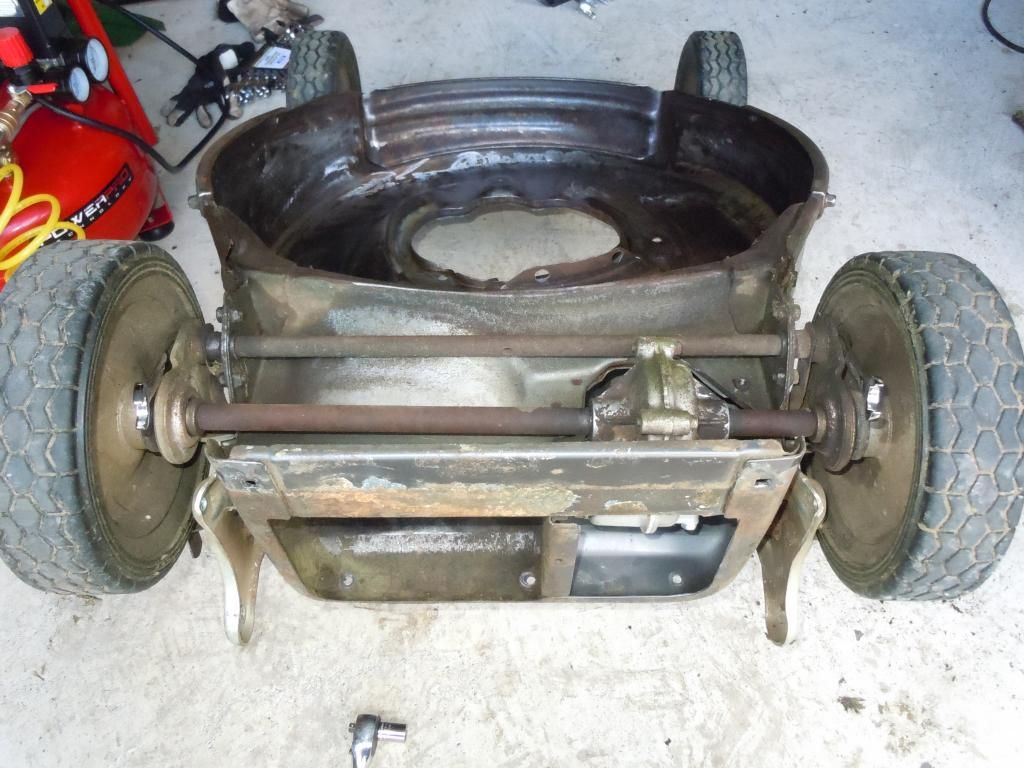
Handles off, time to get the suspension off.


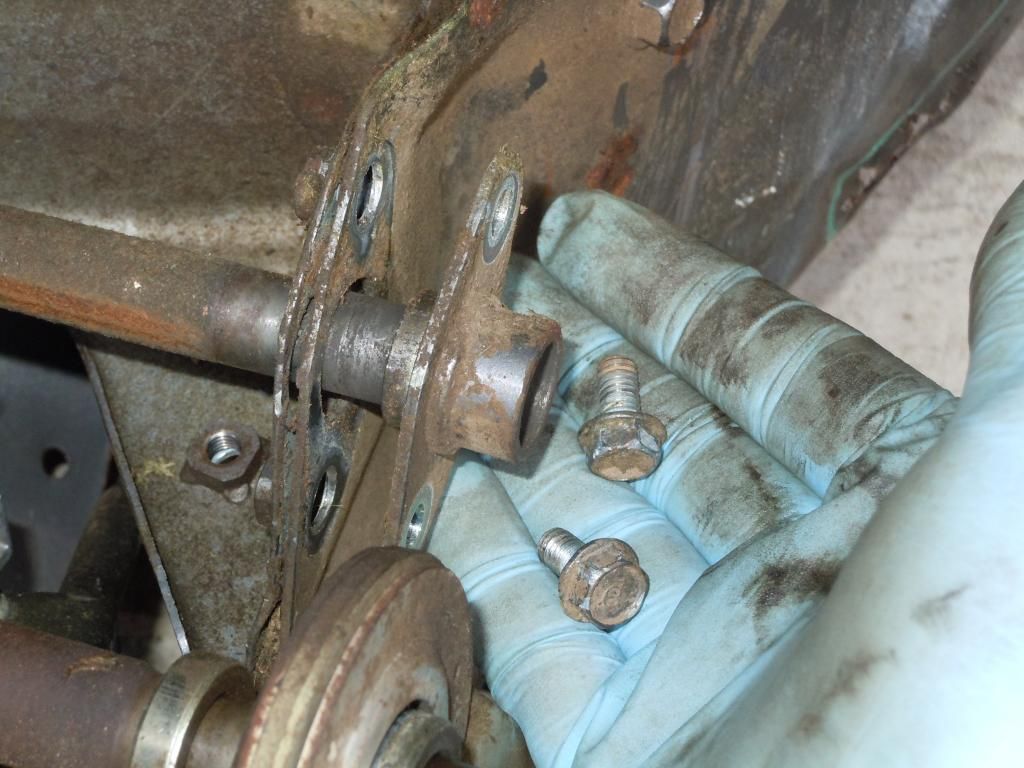
1 x 12mm bolt per side for the sway bar, I used a screw driver through the center hole of the bar to keep it from spinning


Next, remove the handle brackets. 3 x 12mm on the inside. 2 nuts and 1 bolt, per side. USE PB BLASTER


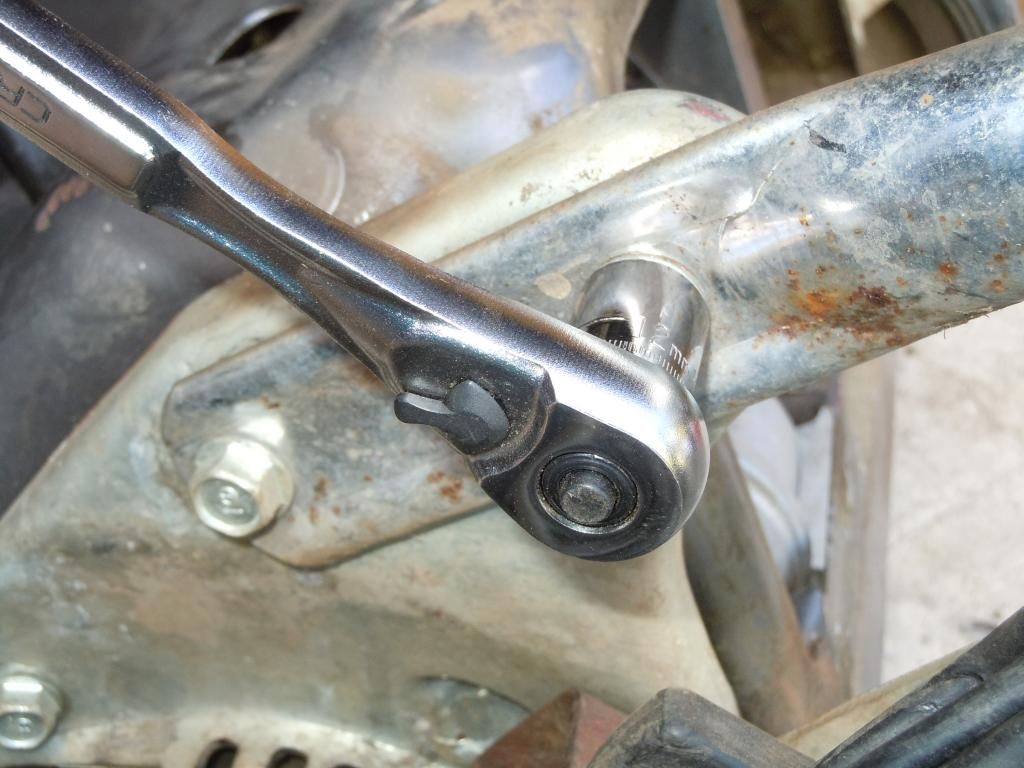
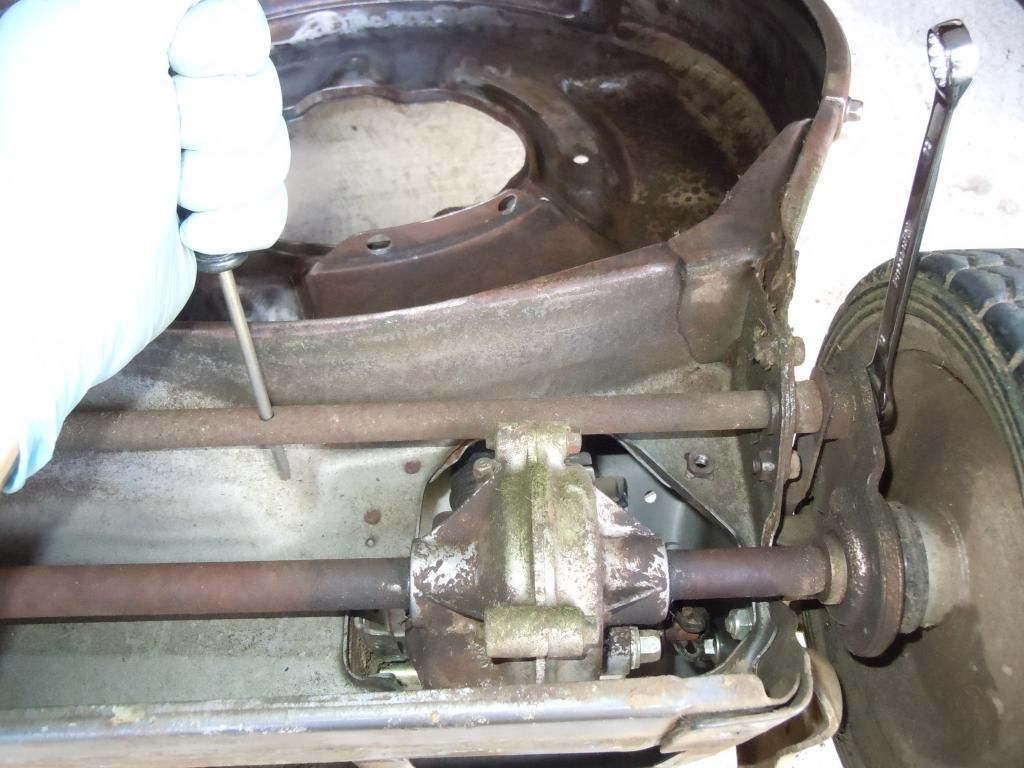
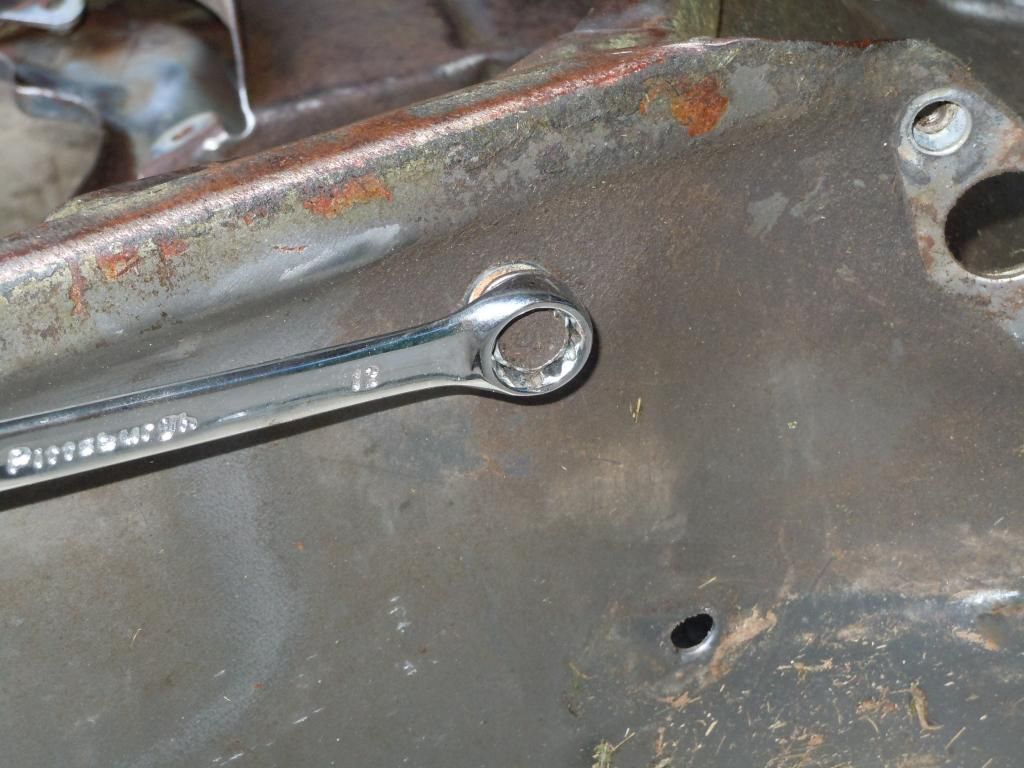
I found the a crows foot 12mm was a life saver on the transmission side for this one


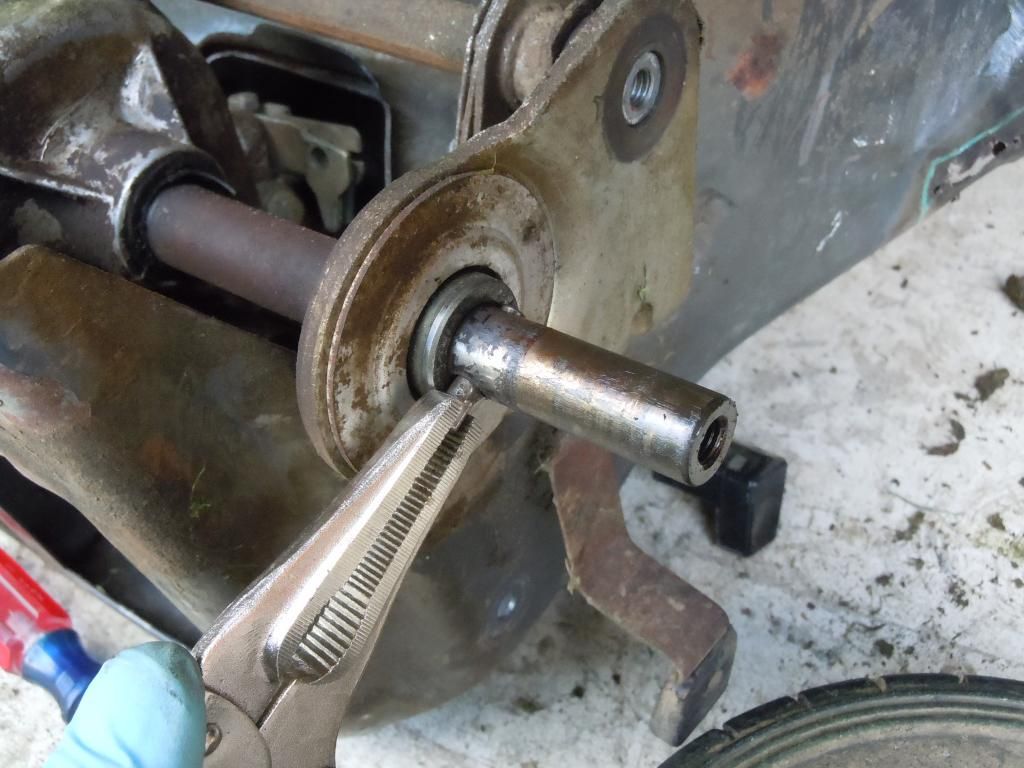
Rear tires,,,one side you will be able to get it fairly easy without the axle spinning too much. I will show you how I was able to get the other side off after this one was. 1 x 12mm bolt with a large washer


Once the wheel is off, pull this pin out. I had to tap it a little with a hammer to get it loose.


I had to tap the hub off as well


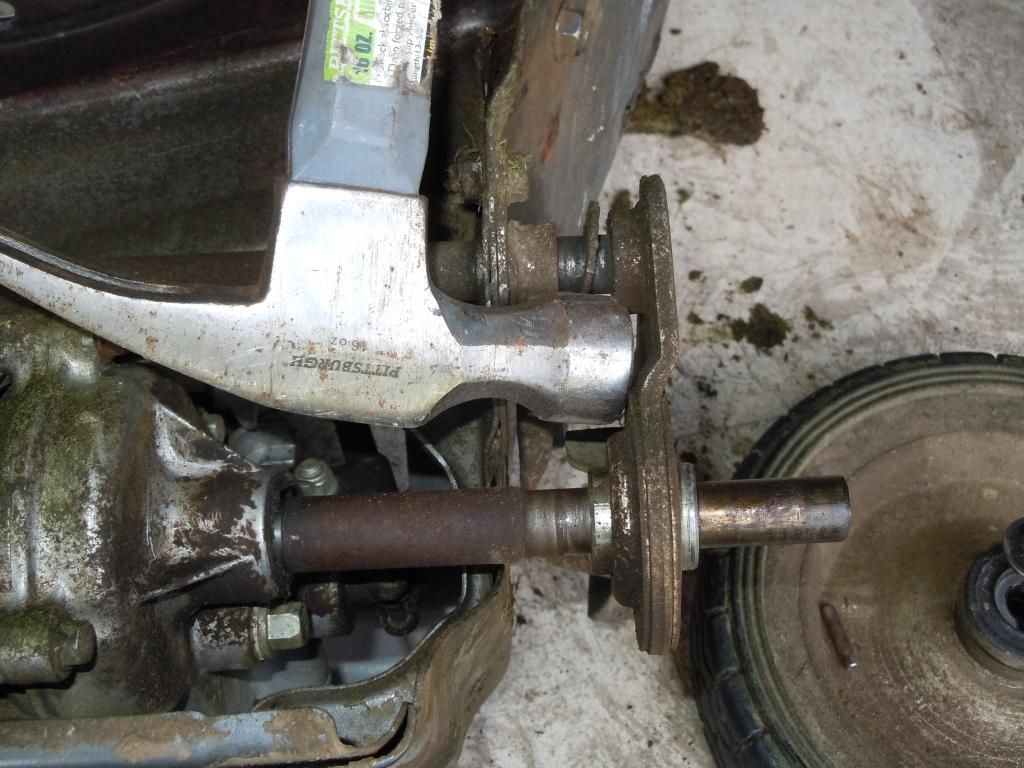
When you slide it off there will be a thick washer on each side.


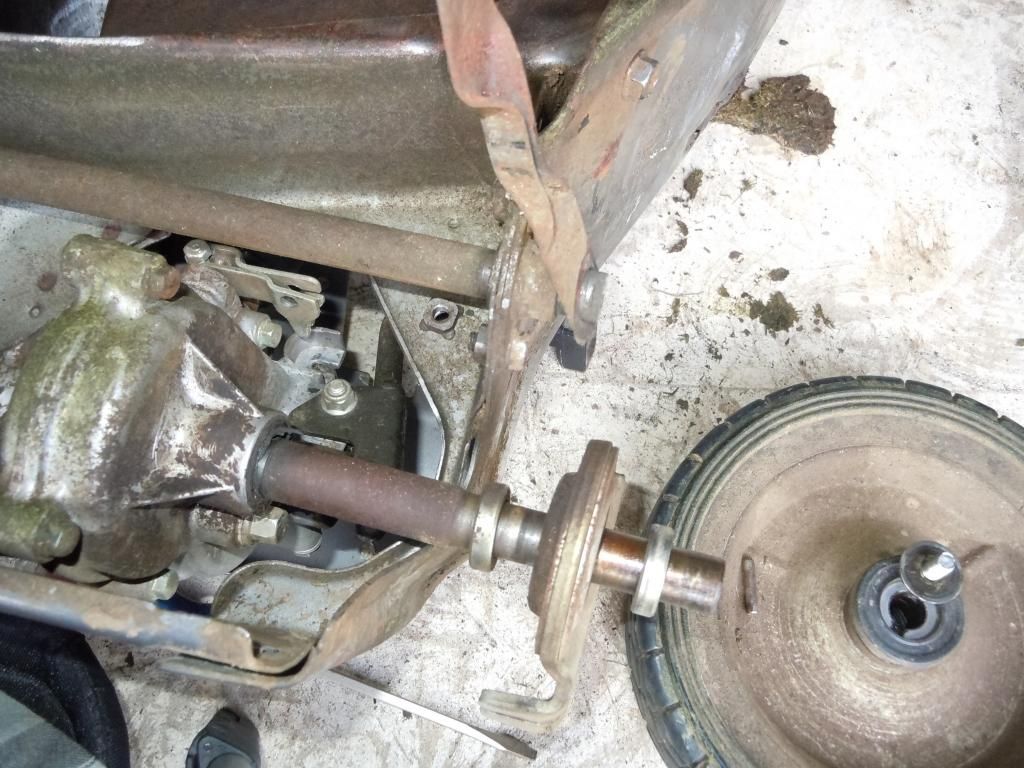
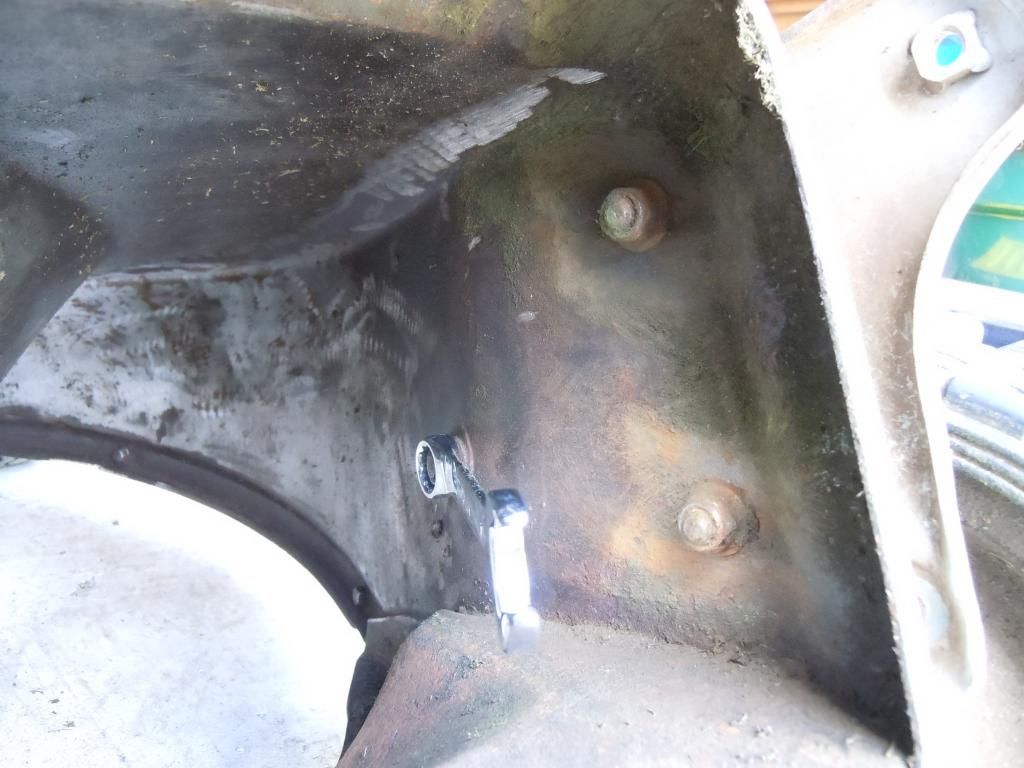
Next is the sway bar flange, 2 x 10mm bolts


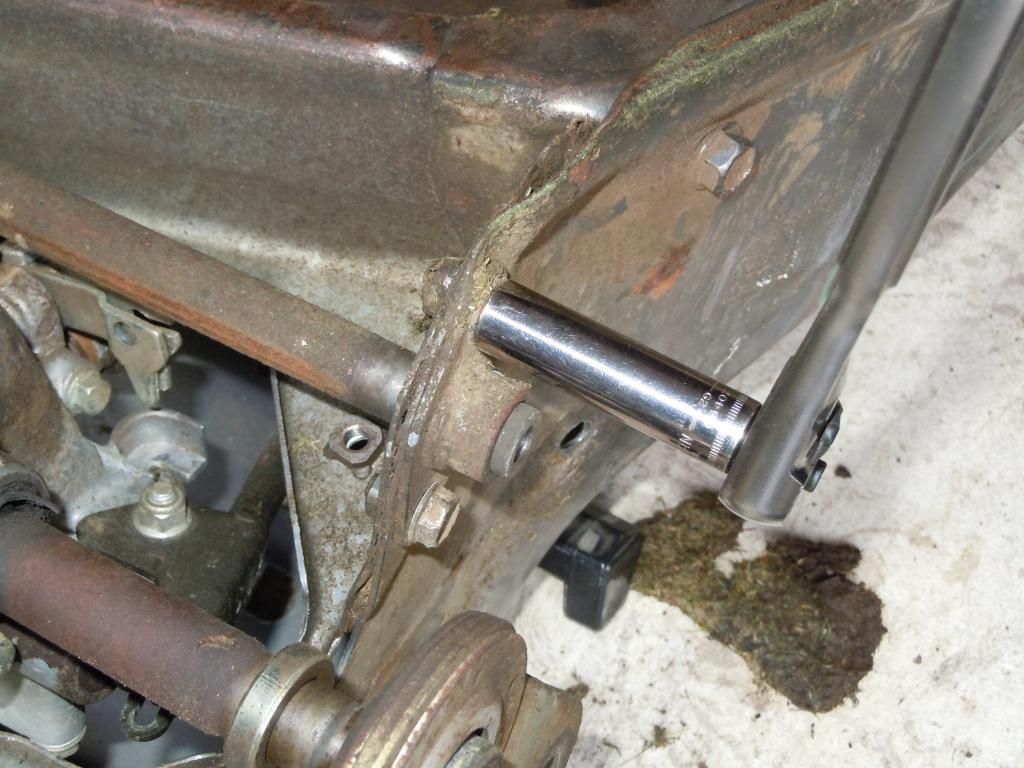
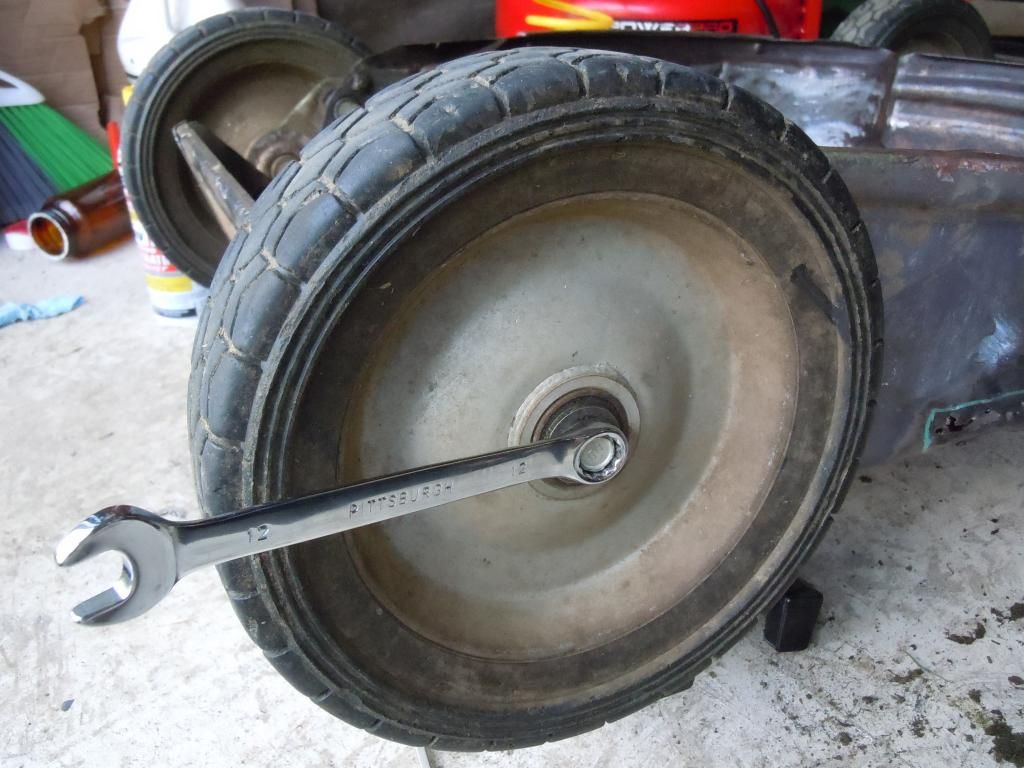
Then work on the other wheel. The pin you removed from the side with the wheel already off is a great spot to put a screw driver to keep the axle from spinning. Proceed to remove the other wheel and sway bar flange. After that you can work on getting the assembly out.

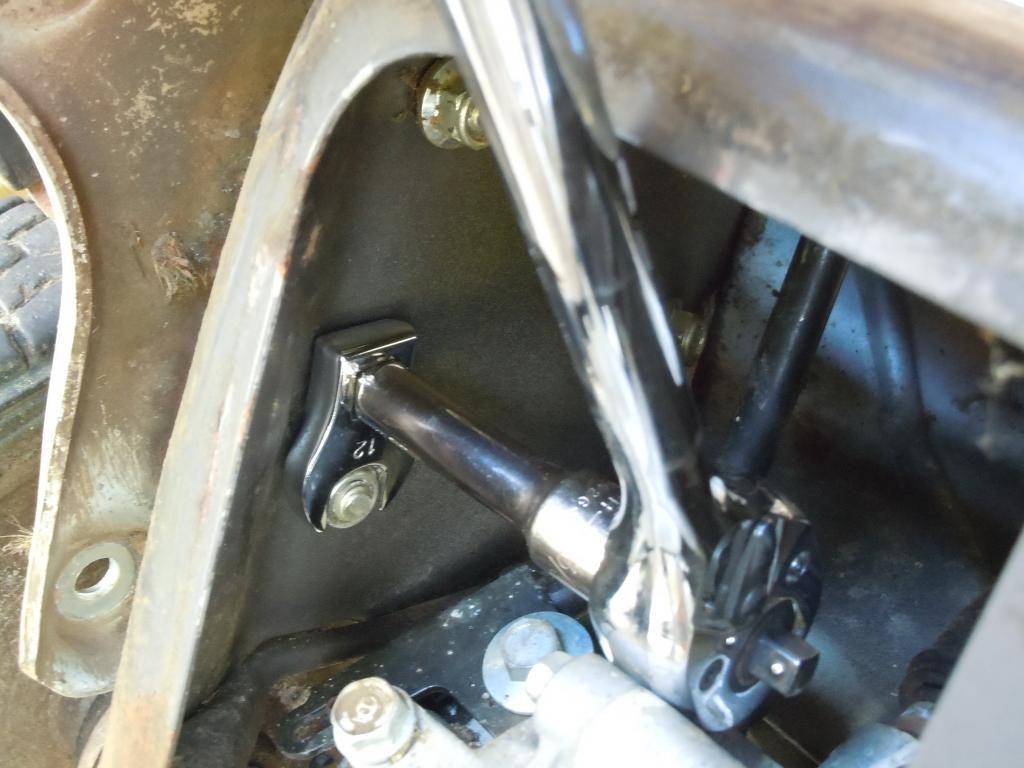
Transmission gear lever has 1 phillips screw. Once that is removed, you will be able to slide the axle/sway bar assembly to the side and wiggle it out


The rear guard (I didn't realize it was so big!) can be removed after you take the remaining two 12mm bolts out. One on each side. USE PB BASTER!!


Wiggle the assemble out


freeloader700

Member
Joined
Apr 25, 2014
Threads
4
Messages
33
Front wheels, 12mm bolt and large washer like the rears


Slide the wheel off. You'll need to remove the front sway bar . Slide the rubber boot to the side


Do the same with the other side


Once you do that, you have to slide it all out from one side as the sway bar has one end welded.


These boots are shot. Not sure where to get them or even what their PN is. Might have to reuse them or find a generic replacement


4 x 5mm allen key, two per side for the height adjustment plate


You can now remove the front guard


Last but not least... 2 x 10mm nut per side for this guard/guide.


You will also need to use a 5/16" socket to hold the bolt from spinning with the nut


Its all apart now!! Took more time than I thought it would. Now I can safely cut out and weld the hole in the deck. I am making some progress!:smile:
 

NJsnapper

Active Member
Joined
Mar 30, 2011
Threads
7
Messages
85
looking good! Now thats a resto project.
 

OutdoorEnvy

Well-Known Member
Joined
May 5, 2014
Threads
10
Messages
102
It's a lot of work just to look through the pics, haha! Nice work. It's coming a long good. Thanks for the update
 

freeloader700

Member
Joined
Apr 25, 2014
Threads
4
Messages
33
Over the weekend I put a bit of work into the project. All the axles/bars have the surface rust removed and are prepped for some paint. (Center bar has some primer on it) As I was cleaning up the transmission I noticed the axle has some movement and a slightly torn dust seal. Is there a bearing inside the transmission or a bushing that holds it straight? How difficult is the job to fix it? Check the video to see the movement


Torn seal on the short side of the axle


robert@honda

Lawn Addict
Joined
Nov 2, 2011
Threads
97
Messages
1,791
Here's a parts & MSRP list / illustration of the trans....appears all parts are still available except the knob...
 

Attachments

  • HRA216SXA Transmission Parts Catalog.pdf
    111.2 KB · Views: 17

freeloader700

Member
Joined
Apr 25, 2014
Threads
4
Messages
33
So I would need 2 x 21521-VB5-801? It is not a bearing, rather a bushing?

and 2 x 91205-VB5-801 oil seals?
 
Top