Briggs 5HP IC Generator

Mkala

Well-Known Member
Joined
Jan 5, 2019
Threads
5
Messages
140
Thanks guy for help, pictures ;)

About power distribution, frequency and voltages.... if someone want to discuss that (technically - not politically) please open a thread. It can be very interesting.
But for now, we just have to use the power we have where we live :rolleyes: this mean I have to be able to run my engine at 3000 RPM :wink:
I
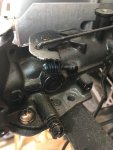
Thanks Scott for the picture, I already read this passage but not sure I understood all. Have to check how this regulation works. Will be easier with removed tank, and here is a pic of fully turned idle scew :
IMG_2009_resized.jpg

I removed the tank, it's pretty clean ! :thumbsup: Dumped the residual fuel, have to rinse the tank and clean the "bowl" ? (don't know the name of the top part where fuel is pumped for the carb ? )

So was able to check valve clearances... they are not good. Have 0.10mm IN and the same for EX... should be 0.10mm IN and 0.25 EX. So a bit of extra work for me :tongue:
But I never adjusted side valves, will read how I have to do. I heard of two "methods", the "right" one with valve removal tool, check if they seat properly - lap them if not - and grind the valve until clearance if fine. The other is to put a small file between valve and pushrod and file until clearance is good.
Have no tools (side valve spring compressor, lapping tool) so if I want to do it right I have to find some I think.

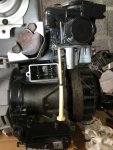
But another this mean I have to remove carb (dont want to break or bend pickup tube) and for this I have to remove exhaust... and I'm about worried to break exhaust bolt ?

IMG_2010_resized.jpg IMG_2011_resized.jpg
 

(Account Closed)

Well-Known Member
Joined
Dec 3, 2018
Threads
6
Messages
260
Those diaphram carbs don't varnish up often but junk and nasty fuel collects in the tanks (short, little "cup"). That carb should come off easily but may destroy the intake gasket, so either or.

As the motor ran fine before I'd probably just give a cleaning while it was still attached.

I wouldn't touch the muffler. That carb tube is pretty flexible and frankly, it shouldn't be much in the way. (If so, yank the carb-(less likely the mounting bolts will be an issue).

*Should you "attack" the muffler, if the bolts don't budge with some serious leaning on them, STOP... Smack the head of the bolts, maybe some penetrating oil. Once cracked loose, back and forth with the wrench till bolts come out easily.

If your tach was reading 3,000, (If I understand correctly), aren't you at the correct RPM (about 3,000) for the proper HZ for your location? IE, any reason to adjust it?
 

Mkala

Well-Known Member
Joined
Jan 5, 2019
Threads
5
Messages
140
Thanks again Scott !

Yes that why I'm worried about these muffler bolts, they offen snap as I have seen on repair videos...
But as you see on picture, seem hard to reach the carb bolt just near the muffler. So I will try to work when leave it like this, as you suggest.

For the RPM I was reading 3400-3600, I have to set to 3000 (perhaps I said it wrong on posts above) ;)

So, I have to order a side valve spring compressor I think :smile:

For tank and small cup on top, almost clean. The screen on pick up tube too. Just a few "sediments" in main tank, cleaned. No rust, pretty great condition :thumbsup:
 

(Account Closed)

Well-Known Member
Joined
Dec 3, 2018
Threads
6
Messages
260
Thanks again Scott !

Yes that why I'm worried about these muffler bolts, they offen snap as I have seen on repair videos...
But as you see on picture, seem hard to reach the carb bolt just near the muffler. So I will try to work when leave it like this, as you suggest.

For the RPM I was reading 3400-3600, I have to set to 3000 (perhaps I said it wrong on posts above) ;)

So, I have to order a side valve spring compressor I think :smile:

For tank and small cup on top, almost clean. The screen on pick up tube too. Just a few "sediments" in main tank, cleaned. No rust, pretty great condition :thumbsup:

Sounds like your making great headway.

I'm not familiar with that particular style governor, so I'm pretty much guesstimating there..

My last Briggs 5 HP horizontal engine I owned, was in the early 1970's, on a mini bike (as a 13/14 year old). Different air filter, different governor (made for various speeds, top RPM 3,600) which was removed completely any way!. The rest the same.

Strongest engine for that bike, could do burn outs, probably run 35 MPH @WOT (I'm guessing 6,500 RPM's-not all the time, :) )

One of my favorite engines, super dependable and fast!!..
 

Mkala

Well-Known Member
Joined
Jan 5, 2019
Threads
5
Messages
140
Thank's Scott ! Yes for the moment it's going well !

Yes for sure you can't know all governor styles, including this old particular one...
What I just try to do is thinking and try to understand what was wrong or not set right; so when I fire it up I can quickly find the right setting.
But will see, now I removed the plate I see on the back the shut-off switch where the wire come (but not on this particular one, because its on the panel where the choke is) so I know for sure the low RPM setting (and that what we said just before).

Yes I see this engine is appreciated for racing ! It is one good strong choice for sure, and is the basis for the old Raptor racing engine :)
I think your mini bike was really fun ;)

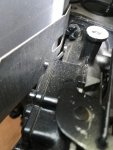
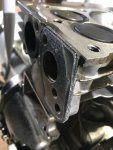
So finally I changed my mind... as I seen the muffler was already removed (bent tabs), I see it's leaking too... so I decided to give it a try to remove it. Fortunately it's was way easier to remove than I expected, not so tight, small back & forth movement to start and increasing range and voila ! And now I understand why it is leaking : there is no gasket anymore... and there is two gaskets on the intake side, strange not ? I think it's the first time that carburator is removed, no traces on screw, nor on carburetor (adjust or where the diaphragm is)

IMG_2017_resized.jpg

So now I have all access to valve springs. The exhaust one looks pretty tight, should no be a big problem with appropriate tool.
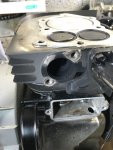
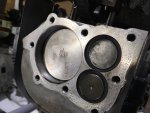
Took the time to clean carbon deposits too. Checked bore, it's in spec so was not re-bored.

IMG_2014_resized.jpg IMG_2012_resized.jpg

By the way someone know the meaning of marking on the piston ?
 

(Account Closed)

Well-Known Member
Joined
Dec 3, 2018
Threads
6
Messages
260
I have no idea about the markings on the piston...

As most of the muffler was leaking between the block and muffler, you want to put a straight edge on the mounting surface of the muffler. That may be bent / not flat (maybe not, ??)

I'd never seen two intake gaskets (factory) but check the manual, if it shows.. One may very well be a "heat shield / barrier" as the upper right edge is indented (from the factory).

As someone definitly had the muffler off, it's very possible they left it off (dropped it, lost it, ?). There should have been some remnants left....
 
Joined
Jul 22, 2017
Threads
21
Messages
2,154
The marking on the piston is 13 for 13 cu. inch.......... I have seen those quite a few times when I was building racing engines way back in the day..........

Plus Tard Mes Amies ~!~!
 

(Account Closed)

Well-Known Member
Joined
Dec 3, 2018
Threads
6
Messages
260
This is posted for Boudreaux In Eunice La. (as requested);

He'll chime in re setting the governor:


Top