B&S 350 Hard to pull start

bertsmobile1

Lawn Royalty
Joined
Nov 29, 2014
Threads
64
Messages
24,705
Rust in that area will be a problem as that is where the handle bar attaches and gets a lot of forces on it which will cause the other side to crack & fail so the mower will be difficult to use.
Next running for a short time without the muffler will not hurt any thing but prolonged running without muffler will damage the valve.
And no if the cam was cactus you will not feel it as what you are feeling for is not there.
The decompressor is just a slight pimple on the cam.

More mportant is have you done any of the tests/ checks an what was the results ?
 

Widget

Member
Joined
Feb 21, 2015
Threads
10
Messages
26
Hey guys,

had another look. So far;

Re-attached blade dish, didn't help.

checking valve clearance;

Using my feeler gauge (they only go up in 5's :(


Intake measured 0.15mm which was a little tight
Exhaust measure - .25mm could slide through with some resistance. .20mm was easier, (.30mm wouldnt get through).

Intake 0.005 0.007 in. (0.13 0.18 mm)
Exhaust 0.007 0.009 in. (0.18 0.23 mm)


I think the exhaust needs a slight adjustment, I'm not sure how to do this. All videos I've come across adjust valves for a different type of engine/mower. I read through the manuals from B&S (linked above), couldn't see anything about adjusting them.

~~ Flywheel key looks ok.


random video clip of be turning flywheel.. dont think its anything special, just shows valves going in and out.

https://youtu.be/M3bim65F4nA

[EDIT/UPDATE]

So I decided to just go ahead and take the cylinder head off, exposing the Piston + 2x valves. Came off pretty easily too, gasket still intact. Must say, looks a little dirty...

Cylinder Head


Pistons & Valves


Would it be ok to clean the carbon buildup with a power drill + wire wheel attachment such as,


or should I try and soak the carbon 1st with some cleaner? If so, which cleaner/chemical do you guys prefer??

Video of Piston + Valves moving

https://youtu.be/8AZLxN_0hrc


Thanks again, much appreciated :)
 
Last edited:

Michael72

Well-Known Member
Joined
Jan 19, 2015
Threads
16
Messages
147
If gasket is worth saving do so...be gentle....take that brush to the head then....i use grit paper to sort piston out but and i would tilt engine so the the carbon falls outward. you dont want any of that in the cylinder!!..flush out then with a carb cleaner etc... valves look ok lash wise with measurements given but at TDC those valves need to be closed tight ish... ifyou can turn them easily they might need lapping/grinding
 

bertsmobile1

Lawn Royalty
Joined
Nov 29, 2014
Threads
64
Messages
24,705
Going to confuse you now but I never ever use a steel brush to remove a carbon build up.
A brass brush is the go if you are going to use a drill but better will be a shothbrite pad.
Not the ones from Coles, the ones you get from car parts shops.


You still have not told me if you checked the valves to make sure the decompression release is working, remember put your finger on the valve stem?
Now the head is off you can watch the actual valves.
Again you can be spending a lot of time buggerising around for no use if the cam is buggered, the engine will note start regardless of weather the piston & head are clean enough to do open heart surgery on.
And as your valve lashes are within spec ( well close enough not to prevent the engine from running ) I am leaning towards a stuffed cam.
Gaskets are cheap so don't even think of reusing any of them unless you are trying to avoid painting the house by not fixing the mower all winter.
Whole top of engine has way too much carbon on it so either the inlet valve has way too much wear or the rings are well & truly on the way out
Also looks like the mower has been eating rocks, that is a nice ding in the top of the piston.
SO now the lid is open and as you seem good with the camera,how about a shot of the bore, piston at bdc ?
 

Widget

Member
Joined
Feb 21, 2015
Threads
10
Messages
26
Hey Guys,

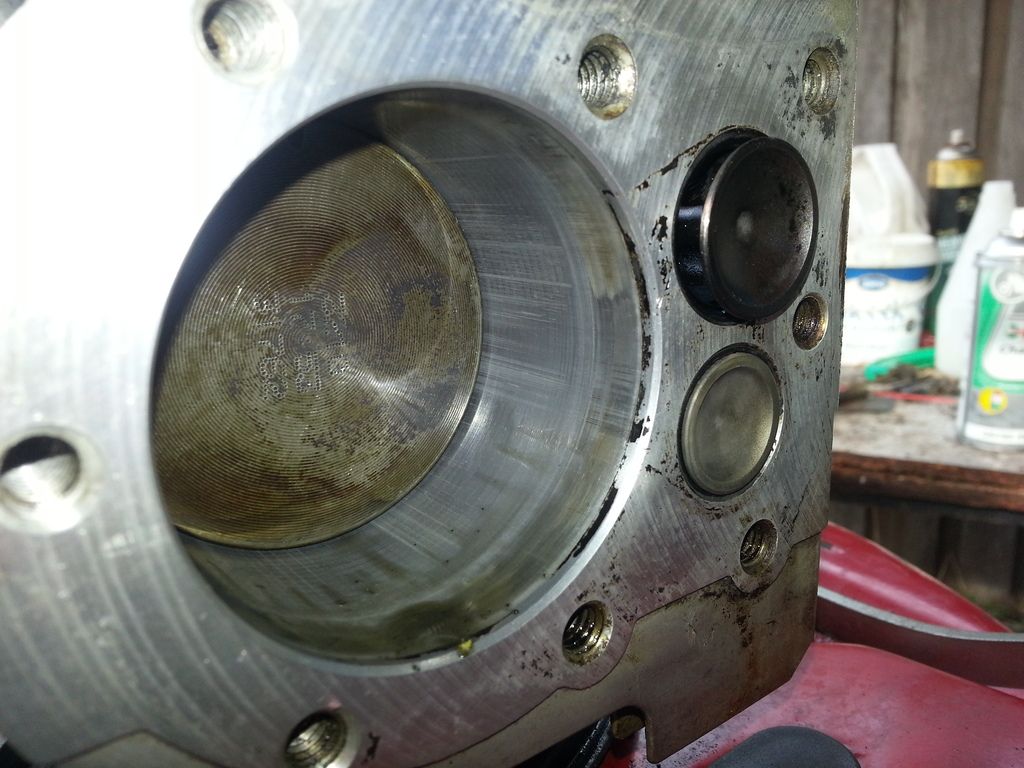
I cleaned the carbon off (mostly), seems like a lot of it was softer. The remaining small portion I used a brass (at least I think it was brass) wire wheel for the dremel, did an alright job, though there were a few small spots I couldnt removed.


I tried moving the valves, and they don't move, no spinning or wobbles.. they seem pretty sturdy.

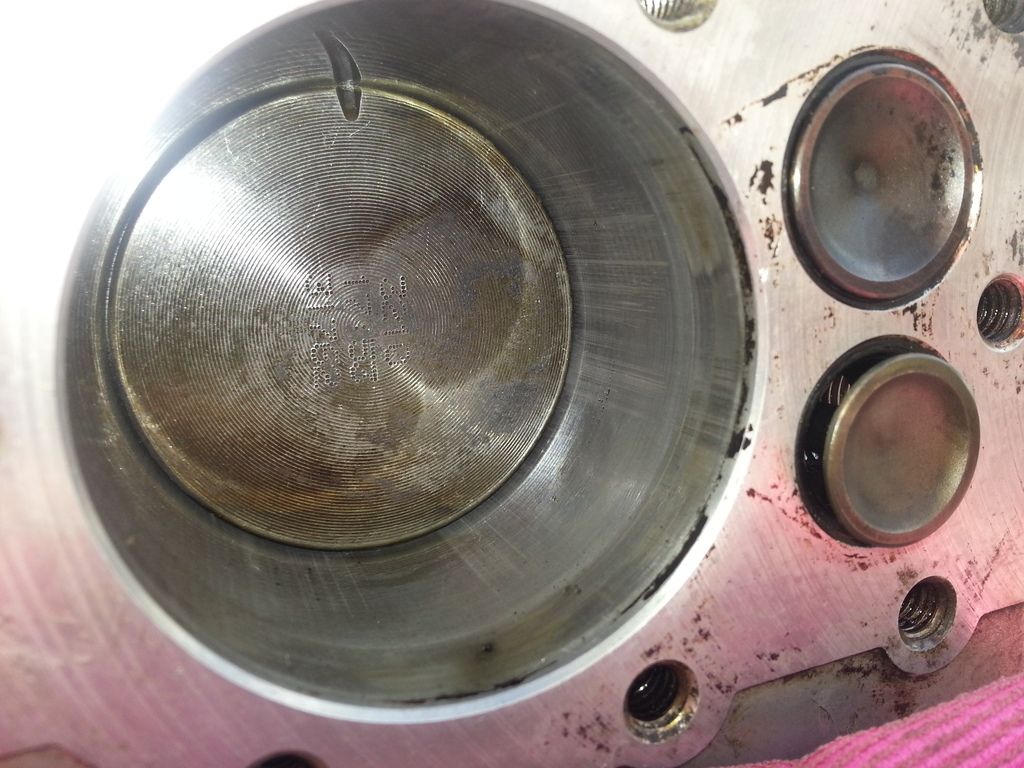
Regarding the bore, I ran my fingers around it and it all feels nice and smooth (though the pic looks like it has scratches up/down, it doesn't feel rough)


You still have not told me if you checked the valves to make sure the decompression release is working, remember put your finger on the valve stem?
Now the head is off you can watch the actual valves.

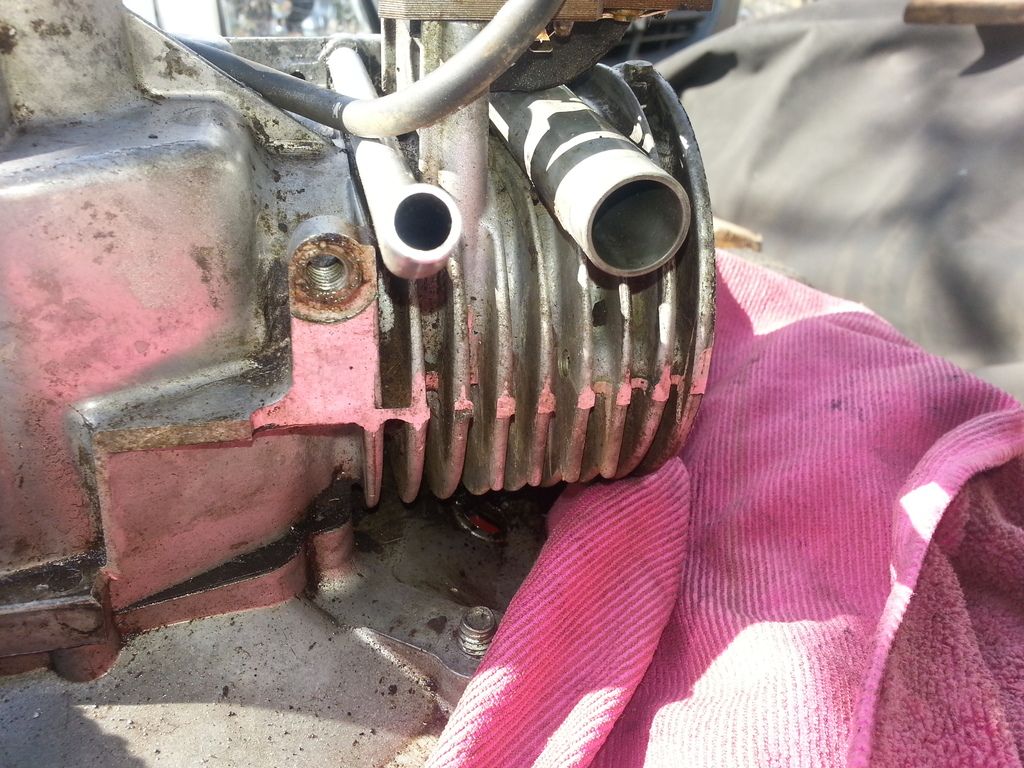
Sorry about that. I'm still a little confused by what you mean. Is it the manifold-intake that leads from the Carb > plastic tube > hole in top of engine (leads to intake valve)? If so, I put my finger in slightly touching the valve stem, it doesn't move until it's at the intake stroke, then it moves forward, then back into position. That's the only time I feel it moving. What would it feel/look like when it decompresses ?


Also looks like the mower has been eating rocks, that is a nice ding in the top of the piston.

I had a closer look, though it doesn't look like an ordinary gouge (could be wrong), it sort of looks like it was manufactured into it (looks clean and even)*shrug*

I'm not really going to worry much about it, certainly won't buy replacement parts (especially if it a cam) though I reckon I'll keep going with it and use it as experience, getting a better look at the engine etc..

Regarding the gasket(s), I'll hang onto this one for same, it came off easy and its not split..at least until I see if I can fix the engine or not. But just wondering, do you guys use or know anyone that uses Liquid Silicon gasket (not the quick fix stuff)? I've got another mower that needs gaskets, also a whipper snipper & I thought rather than buying a few gaskets, thought cheap(ish), I thought I might be able use it to seal multiple sections...thoughts ?

is there anything else I should try before cracking it open and looking at its insides ?


Thanks again :)
 

bertsmobile1

Lawn Royalty
Joined
Nov 29, 2014
Threads
64
Messages
24,705
Well now that the head is off you can simply look at the valves going in & out as you rotate the engine.
The inlet should open fully as the piston descends, then close near the bottom of the stroke then just before the piston is back up the top ( compression ) it should open just a tiny bit.
It is a lot easier to feel than to see.
If your inlet valve does not do the little opening then the cam needs to be replaced and most likely the cam followers as well.
These little engines take a beating particularly when mowing hilly yards and the oil level gets a bit low.
This will be the reason why the engine was hard to pull.
The scoring on the barrel gets checked with your fingernail not your skin.
Run your fingernail across it and if you can feel it catch on the scores then the gas will get past and it needs a hone at least.
If you are going to remove the piston & hone the bore then you need to fit new rings and you will need a full gasket kit as the end float on the crank ( the amount it moves up & down ) is controlled by using different thickness of gaskets or multiple gaskets.
You will also need to measure the bore and check for both tapper and ovality.
By the time you have finished you will just about finished the TAFE small engine certificate.
 

Widget

Member
Joined
Feb 21, 2015
Threads
10
Messages
26
Thanks Bert :)

I decided to just go ahead and open it up.. though I'm at a crossroad. Do you know how to remove this heard/tip[ from the crankshaft?


most of the videos seem to have a straight shaft that the base just slides of.. but mine is being stopped by this.

Thanks :)
 

bertsmobile1

Lawn Royalty
Joined
Nov 29, 2014
Threads
64
Messages
24,705
Hey its winter, although a nice 25 deg C at my place, so plenty of time.
The dreaded Victa blade plate boss is simply pushed onto the shaft so it pulls off the shaft.
And that is the understatement of the century.
It is keyed so you can not turn it so it is lots of penetrant ( not WD40, real penetrant.
I use 50:50 acetone / ATF.
Lots of heat , lots of penetrant, lots of heat.
Victa make a very expensive tool for removing the blade plate boss.
I use a 2 leg puller bearing against a long bolt threaded all the way to the end of the hole.
This is important as otherwise you will strip the thread inside the crankshaft.
Some put a short length of rod down there other use a big ball bearing.
Just be carefull because if you put something soft down there as it can expand and become impossible to remove latter on
A rattle gun on the puller works a lot better.
If it does not come off with your first hit, heat it up to spit boiling point then turn it over and stand the end in a container of penetrant ( this will smoke badly )
Leave it there till it is stone cold. Flip it back over, put your puller back on and heat.
Repeat as necessary. Some have taken better then a week to get off which is why Victa get away with charging $ 200 for the puller.
They only seem to come in two varieties.
Compliant and just about fall off.
Fight you to the death.
 
Top