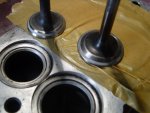
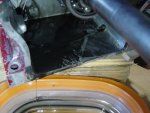
Briggs 5HP Flathead I/C overhaul (re-assembly in progress :) )

Mkala

Well-Known Member
Joined
Jan 5, 2019
Threads
5
Messages
140
  • / Briggs 5HP Flathead I/C overhaul (re-assembly in progress :) )
Hello all :)

Last year I worked on a similar engine used as a generator. I love those old Briggs flatheads, especially the 5HP I/C with sleeved cylinder, dual bearings and oil alert.
Si I won for five bucks the auction of the following motor, that was the description, I even don't know what was the usage/application :
- Briggs 5 HP
- Hard to start
- 19.05mm shaft (3/4'')

For this price I don't need to know anything else... best case I can make it run, worst case I'm happy to do some wrenching and I save parts for the other motor.
Furthermore with the current stay-home period, I have something to play with when the wether is bad.

I just pick it up today, it was close to my location. It's not locked up, but has low compression feeling on the rope.
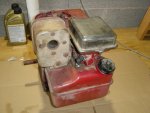
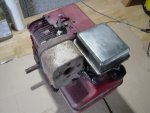
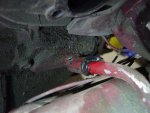
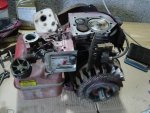
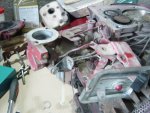
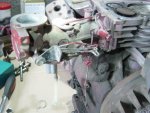
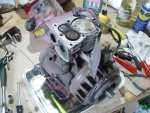
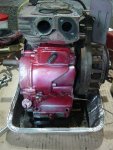
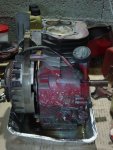
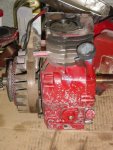
Pics as I got it :
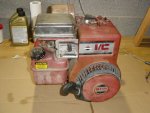
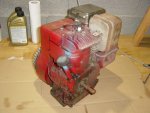
DSC01341_resized.jpg

DSC01342_resized.jpg

DSC01343_resized.jpg

DSC01344_resized.jpg


Paint is even worst in reality... very faded, it has dealt with weather for sure during at least a part of this 30+ years old - it's a 1990 model.
Even come more than half a fuel tank, and it is not rusty. Good new. It has oil (thanks oil alert - this force people to at least fill it) and it does not look too bad - will see better when I drain it.

Compression is low, spark plug is a NGK so not original, and changed by someone did not have a spark plug wrench (broke a bit of a fin and pliers marks on the plug).
But it has spark, that's good too! Spark plug is fouled and the gap is too small, 0.55mm instead of 0.75mm nominal. At least it the good reference, NGK BPMR6A that cross with original Champion RCJ8.
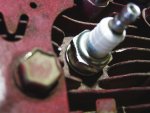
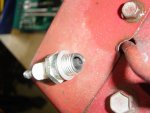
DSC01353_resized.jpg

DSC01356_resized.jpg

Time to remove the head to know more, but first the shroud with the recoil. The base is quite oily, I think replacing all the gaskets will be needed.
We can see inside of shroud is oily too. I don't know yet if I will remplace the crackshaft seals ? For flywheel side this mean I need to remove the crankshaft, but I'm not sure I will go this far - I not needed I leave the piston and the rod assembled.
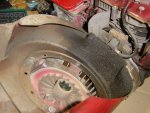
DSC01358_resized.jpg

Wow air filter is really old and dirty, and prefilter even worst... this can explain the look of the spark plug too.
Foam is close to disintegrating, but they are known for.
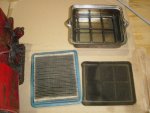
DSC01346_resized.jpg
 
Last edited:

Mkala

Well-Known Member
Joined
Jan 5, 2019
Threads
5
Messages
140
  • / Briggs 5HP Flathead I/C overhaul (re-assembly in progress :) )
(I was limited to 10 pics...)

The 3 longs bolts are not in the right spot anymore, and we have marks on almost all fasteners. Someone did some repairs -or try to do- on it.
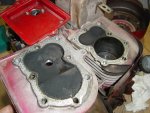
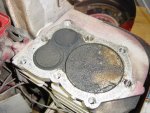
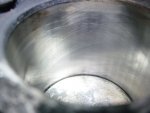
Inside there is some carbon build up, I'm not sure the valve are sealing good. Cylinder looks ok, nothing I can feel with my fingernail. Some traces of use of course, but crosshatch is still visible. No play of the piston in cylinder at TDC.
Good new, as if the cylinder is toast, the engine is toast too. But some cleaning to do for sure...

DSC01360_resized.jpg

DSC01365_resized.jpg

DSC01376_resized.jpg

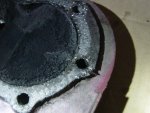
About low compression, I think there is two problems. First, head gasket is damaged, it is leaking at the most right bolt on picture. We can see the missing part on the gasket (still on the head below), the traces on the block between cylinder and bolt - and this bolt had some carbon built up on it !

DSC01368_resized.jpg

The other source of low compression are the valve, at least the intake. I can rotate this one by hand when closed, and when I removed the air filter I was able to hear a "pschhhh" from the intake.
For sure, I have to set the valve lash and do a good lapping to make them seal properly.

Others traces of "human being there" in the past, including coil rubbing on the flywheel and customs "clamps" for breather tube, with RTV in bonus. This is not needed, even if those rubbers are always a bit loose, they are not cracked. So for a crankcase breather that's fine.
So definitely someone tried to make it run correctly, scratches and marks are there, but nothing broken until now, that's a good start.
DSC01378_resized.jpgDSC01382_resized.jpgDSC01383_resized.jpg

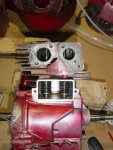
Current state of disassembly. I think the carburetor and the muffler was the last disassembled things - at least recently, not recent traces on the valve cover / breather. This is however where I need to go to fix the valve issue, but the downside of this engine is you need to remove the muffler, the carburetor, the fuel tank and bracket/throttle plate to access it. When you have a shop and you need to put this on a bill, this often make the engine go to trash - and sometime on auction for close to nothing, to make someone else happy :)

DSC01384_resized.jpg

To be continued...
 
Last edited:
Mkala

Well-Known Member
Joined
Jan 5, 2019
Threads
5
Messages
140
  • / Briggs 5HP Flathead I/C overhaul (re-assembly in progress :) )
I continued my work on this 5HP (and my monologue here :p )

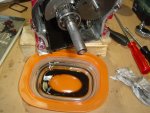
This was a bit less fun, has after removing tank and carb, this was only cleaning. Greasy stuff with dirt all around the block, but I need something clean to be able to open the crankcase.

Checked the valves lash, no surprise with intake, zero lash (as I was able to turn the valve with finger when it was supposed to be closed). Exhaust is not bad, more in the 0.20mm range instead 0.25mm, I am a bit surprised - I would have thought exhaust is often worst than intake ?

DSC01396_resized.jpg DSC01400_resized.jpg DSC01402_resized.jpg DSC01403_resized.jpg DSC01408_resized.jpg DSC01410_resized.jpg

Start to looks better, even if the paint is flaking and goes away with the dirt...
 
Last edited:
tom3

Lawn Addict
Joined
Apr 9, 2018
Threads
25
Messages
1,579
  • / Briggs 5HP Flathead I/C overhaul (re-assembly in progress :) )
Those horiz. IC motors are pretty tough. Clean the carbon, lap the valves, get the clearance right, new gasket, probably good to go. And good to see those cooling fins on the cylinder are nice and clean.
 

Its Me

Active Member
Joined
Apr 11, 2011
Threads
1
Messages
82
  • / Briggs 5HP Flathead I/C overhaul (re-assembly in progress :) )
I love working on them to, check the valves and like tom3 lap the valves those were famous for the exhaust valve burning a spot of them, that cylinder looks great, get someone with a valve grinder to light face them or it can be done on lathe, Joe
 

Mkala

Well-Known Member
Joined
Jan 5, 2019
Threads
5
Messages
140
  • / Briggs 5HP Flathead I/C overhaul (re-assembly in progress :) )
Thanks for your comments tom3 and Its Me. So I'm not alone to love them ;)

Yes I need a head gasket for sure, don't know if I will buy the whole gasket set, the motor was pretty greasy - so some leaks exist here and there. For sure the dipstick tube oring is toast, but other probably too. Thereupon, I don't know if I will keep this plastic dipstick... it is in bad shape and I prefer the "classic" oil fill and check at the bottom of the crankcase (but it was probably added for more easy access). Does anyone know a "plug" part number exist to close the hole in the crankcase cover ?

And of course I'll clean all the carbon in the head, on the block and the valves, grind the tip of the valve stem to adjust clearance. Check valve play in block/bushing. Hope the seats and valve are in good shape so I can lap them so they seal nicely.

I plan to remove the flywheel to, to check the crankshaft seal and degrease all the dirt behind. But I have to buy (or build) the tool for starter clutch and the flywheel puller. Will see on the weekend, less time during the week.
 

Mkala

Well-Known Member
Joined
Jan 5, 2019
Threads
5
Messages
140
  • / Briggs 5HP Flathead I/C overhaul (re-assembly in progress :) )
I progressed in the disassembly this weekend

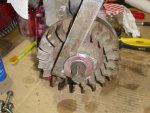
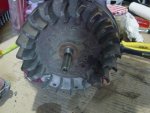
First I made a little "tool" from a flat steel bar, two holes and a bit of grinding to allow me remove the starter clutch. I know a tool exist, but time to order with current restrictions and shipping that will double or triple tool cost, I went DIY. Worked great with a few tap on it with a small hammer while holding the flywheel.

I was surprised to see flywheel without holes to remove with a puller ? It is always like this with this kind of long crankshaft ? (because of this old starter clutch usage ?) So I went the way with prying behind the flywheel and small taps on the crankshaft... was very easy to pop off, second try ! nice :)

Removed the coil and now it's time for a good clean here ! Done.

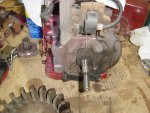
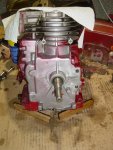
DSC01413_resized.jpg DSC01416_resized.jpg DSC01417_resized.jpg DSC01419_resized.jpg

Next I jump to the valves. Hard time to remove them because I was convinced I need the valve spring tool to remove them... (don't know why...) in fact you only need to put the retainer in the right position and push it with a flat screwdriver (I have the cup retainer style). Waste of time... but at least its done.
All good carbonated up, intake even on the sealing surface. Have to clean all good valve and seat and lap them.

I checked the valve play (stem to guide), and exhaust as some. Guide is good (6.40mm, reject is 6.73mm according to my old post https://www.lawnmowerforum.com/threads/briggs-5hp-ic-generator.52044/page-7) but anyone know the valve stem rejection / minimum size ? At the middle of the stem I am at 6.15mm, nominal diameter of the valve is 6.25mm. Nominal guide is 6.35mm so I almost doubled the play from 0.15mm to 0.25mm. Not a big deal if guide is allowed to be worn to 6.73mm, this mean 0.38mm of clearance/play even with no valve stem wear.

But anyone has an official reference or a place I can look at normal stem values ? Thanks !

DSC01423_resized.jpg
 

Mkala

Well-Known Member
Joined
Jan 5, 2019
Threads
5
Messages
140
  • / Briggs 5HP Flathead I/C overhaul (re-assembly in progress :) )
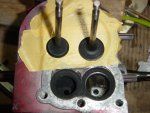
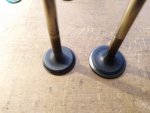
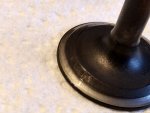
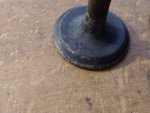
I cleaned the valves and inspected them more thoroughly. I am a bit concerned with them, some pics below :

IMG_20200512_210021_resized.jpg IMG_20200512_192516_resized.jpg IMG_20200512_210045_resized.jpg
- The intake has quite a deep groove, is this a problem ?
- The exhaust has some "pitting" on it, should I clean it with something more abrasive, like a scotch bite pad ?
- I'm still looking the minimum acceptable valve stem diameter

Any advice will help me. I don't have the experience to say if those valves are good and I just have to clean them and do the lapping or if they need to be changed ?

Thanks :)
 

Mkala

Well-Known Member
Joined
Jan 5, 2019
Threads
5
Messages
140
  • / Briggs 5HP Flathead I/C overhaul (re-assembly in progress :) )
So finally, I clean the valve good and I lap them. The exhaust had a little bit of pitting, but should not be a big concern.
The intake worries me a bit more, the ring is clearly at the outside. An the seat "seating" size is at max of tolerance according Briggs manual. Anyway, I give it a try.

DSC01432_resized.jpg DSC01436_resized.jpg

After that, it was time to grind the valve stems to set correct clearance, 0.25mm EX and 0.15mm IN.

Next and last big thing to check : open the crankcase. I was not really worried as the piston does not looks to have play regarding to the crankshaft when I move it up and down. But its better to check and it is also a good opportunity to clean the block. The oil wasn't too glittery, tha'ts always a plus. And some black deposit at the bottom, even perhaps with a bit of moisture. All is clean now :)
I think I am the first to open the crankcase cover, the gasket is hard has a rock. No tool traces on the folding locks of the connectig rod bolts - all seems original. But someone over tighten the bolts of the cover for sure, trying to make it a bit less leaky I think (but this does not work).

DSC01441_resized.jpg DSC01440_resized.jpg

Next step, carburetor, order engine gasket set and carburetor overhaul set I think ?
Don't know if someone is still reading ? lol
 

StarTech

Lawn Royalty
Top Poster Of Month
Joined
Feb 19, 2020
Threads
76
Messages
10,225
  • / Briggs 5HP Flathead I/C overhaul (re-assembly in progress :) )
Yes the intake valve should be replaced. How is the valve guides? Is there considerable amount of side to side movement. Usually the exhaust guide is the one that wears the most.
 
Top