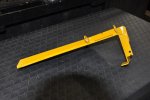
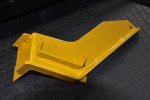
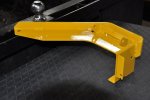
Raptor SD 54" Deck Discharge kit.

mhavanti

Well-Known Member
Joined
Oct 12, 2014
Threads
12
Messages
924
Boyler,

After watching two hydro rebuild videos from start to end and strange enough they both mentioned the "only difference between 2800 and 3100" is the extra valve. Mine is getting the valves.

The Fastrack across the street I rode, I used the GPS to see what his ground speed was. It is supposed to move at 9 mph. It will only move at 8.8 but then, he could use some tweaking on his sticks and adjustment rods more than likely. His hydros don't whine as loudly as mine either.

My SD only moves at 6.8 mph and it is supposed to move at 7.5. I also have not tweaked mine for the extra speed. Although I did tweak the left side to speed up to the right. There seems to be enough travel on all the adjustment areas of the rods and the brackets at the hydros to get the speed it is supposed to run. May do that sometime this summer if I can find the time for it. I don't like being outrun and I don't care what it is on. I don't like finishing second. lol

If I can get mine to 9, I'll be happy at that time, however, after it sees 9, I'm probably going to want to see 10.5 mph.

I really want is forty foot wheelies, but, don't foresee that anytime soon with a 24 horse motor. lol.

Max
 

BoylermanCT

Well-Known Member
Joined
Jun 7, 2016
Threads
12
Messages
164
Max, I got the same speed on my RSD with GPS. I was highly disappointed that I only got 6.5mph or so when they claimed 7.5mph. I took it back to the dealer to have them adjust the levers and hydros, and they were able to get 6.8mph. Still disappointed about the speed to this day. I figured they had a 90lb woman driving the RSD during their speed tests!

What is involved in adding a 3rd valve? Drilling holes in two perfectly good hydros worries me!
 

mhavanti

Well-Known Member
Joined
Oct 12, 2014
Threads
12
Messages
924
From my recollection of watching those videos last year. You pick up the extra valve, drop it in, button up the hydro and it is a done deal. There wasn't any drilling, grinding etc.

The video explained there can be any combination of two of the three valves placed into a hydro and by only installing two of the three valves, you just created a 2800. If you install all three, you have created a 3100 hydro.

I found that very interesting. I had to reinstall my Windows and lost all my favorites or it would be as simple as open favorites and click on it. Now it is researching youtube for it. Hopefully that won't be too hard to find again. Last time, stumbled across it looking for something else.
 

BoylermanCT

Well-Known Member
Joined
Jun 7, 2016
Threads
12
Messages
164
Here are the instructions from the deck modification kit. You have to cut out the triangle on the rear of the discharge area, cut out the bar across the bottom of the discharge chute and cut the welds holding the mount for the plastic discharge chute Then drill some holes for the bolts. Have not done it yet, waiting for my new mower deck to be installed.

View attachment DOC.PDF
 

mhavanti

Well-Known Member
Joined
Oct 12, 2014
Threads
12
Messages
924
Send me a private message with your email address and I'll send you what I've done to my ole SD60. I like my modification and will not require any upper support and will maybe save someone's toes or better, the blade and spindle in the event the open deck gets into the curve of the upper deck with something you would prefer not to.

I'll be posting a video as soon as I get another grinder to make this pretty and get it repainted.

Max
 

Kremeneon

Well-Known Member
Joined
Apr 17, 2014
Threads
7
Messages
242
Here are the instructions from the deck modification kit. You have to cut out the triangle on the rear of the discharge area, cut out the bar across the bottom of the discharge chute and cut the welds holding the mount for the plastic discharge chute Then drill some holes for the bolts. Have not done it yet, waiting for my new mower deck to be installed.

View attachment 38526

Oh wow, the kit isn't just an angle piece across the top, it is a big plate with the bar attached, and the whole thing sisters up around the entire opening.

I'm considering it now....
 

mhavanti

Well-Known Member
Joined
Oct 12, 2014
Threads
12
Messages
924
Kreme,

Hang on until you see what I've done to mine. All of this so you fellas have an alternative to butchering your decks. lol.

Send me your email address in the private messages and I'll send you a clip of the upcoming video so you can see what it is I've done.

Max
 

BoylermanCT

Well-Known Member
Joined
Jun 7, 2016
Threads
12
Messages
164
Here is what you get with the deck modification kit. Nice heavy duty plate and a bag of bolts. They want you to drill several 0.41" holes. Had to get out my calculator - works out to be a 13/32 drill bit (0.40625)

_DSC0066.jpg

_DSC0067.jpg

_DSC0068.jpg
 
Last edited:

mhavanti

Well-Known Member
Joined
Oct 12, 2014
Threads
12
Messages
924
Shame that doesn't cover up the boom-a-rang cut out on top of the deck.

Gonna run over in the morning to the fair grounds in the 40 inch weed and feed lot and run thru about a 1/4 acre of that mess to see if the deck modification works as well as I believe it will. If not, since it is cut this far, I'll slide and dice the deck to oblivion or at least until the front and rear of the lowered portion of the deck you've seen in the video.

Don't foresee any addition to the top of the deck though other than putting in the scab to close up the boom-a-rang cut out. That in itself will take care of any alleged weakness.

Stay tuned.

Max
 

mhavanti

Well-Known Member
Joined
Oct 12, 2014
Threads
12
Messages
924
Alright, here is what I've done to get the deck blade guard down below the blade to make the guard doesn't encumber the exiting clippings. The paint on the outside of the guard is temporary and that surface was not prepared for paint. Thus, it has some masking tape still on it. You'll see it in the video when it is finished and published in the MaxsGarajMahal YouTube Channel.

I would upload the highlights here, however I've not figured out how to do that without a url. I'm only guessing that url stands for ugly reality live but I really don't know.

If the paint will stay on the cut surface during this 24" to 42" weed cutting test later today, I'll sand the outside of the guard and give it a nice cover to smooth it out and make it not so Yugly. As one of the dealers here in Arkansas once said: "Don't buy no ugly truck." Just tranpose that to 'mower'.

Max


DSC05047.jpgDSC05048.jpgDSC05049.jpg
 
Top