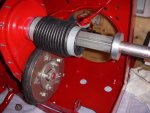
Snapper RER 28085S Restore

mattm55

Active Member
Joined
Mar 6, 2017
Threads
3
Messages
81
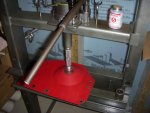
I'm still waiting for a few parts for the rear end and the weather in the northeast to warm up for painting. Yesterday I did get to press in the new rear axle bushings. I used a HF 20 ton press with a set of HF Maddox 10pc Bearing Race and Seal driver kit. The HF stuff works great for this small stuff.

axleBearingPartNos1.jpgaxleBearingPress1.jpg

Progress....
 

mattm55

Active Member
Joined
Mar 6, 2017
Threads
3
Messages
81
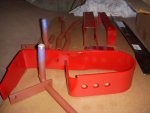
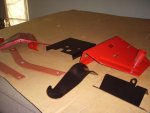
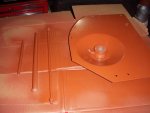
OK. I have the heater working in the garage so I can get my pieces primed and painted. Using Rustoleum Gloss Cherry Red for the topcoat.
Making progress and hopefully I'll get the case and front end prepped and painted. I'm thinking I can get the main case into the blast cabinet? Hopefully....

  • Seat/SpindlespaintingParts_1.jpg
  • Misc pieces paintingParts_2.jpg
  • Rear fender...paintingParts_3.jpg


Matt
 

NorthBama

Well-Known Member
Joined
May 28, 2014
Threads
9
Messages
932
Looking good thanks for the pictures with update
 

Boobala

Lawn Pro
Joined
Feb 15, 2015
Threads
200
Messages
7,000
Lookin good Matt ... PATIENCE... it pays off , does'nt it ??
 

mattm55

Active Member
Joined
Mar 6, 2017
Threads
3
Messages
81
Progress being made...

Edit: I also want to credit "jimsfixitshop" videos that I'm referencing. He's got a nice 7 part series rebuilding the Snapper RER. While mentioned below I find things a little different in assembly from his to mine. For those differences, I'll point them out for my 1985 28" Snapper in the forum.

1. I have the chain case all together. Nothing out of the ordinary but I did have some extra play in the hub & sprocket (3/16"). I used my 20 ton press to reshape the case to remove the extra end play. I thought about using shims from the old spacers but the press worked for me.

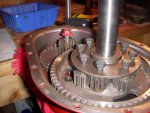
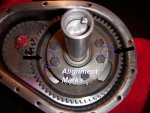
2. Moving on to the differential, I am following a video which omits a few parts from my build actually. A thrust washer in particular below the 63 tooth gear. I am overriding the video with the manual and parts diagrams whenever necessary. In the diff rebuild, I'm doing the "extra tuff" mod. I am using 8 gears instead of the 4 from the original. I did notice that there are alignment marks to line up with on the gear and top plate as shown in the pic. I haven't noticed any references to these alignment marks online so I wanted to point them out.

  • Extra Tuff Mod 1 extraTuffMod1.jpg
  • Extra Tuff Mod Alignment extraTuffMod2.jpg

3. I gave the wrong color of Rustoleum I was using in a prior post. I am using Rustoleum "Regal Red" which is a little darker than original but pretty close. I am colorblind to red and green though (testing only) ;o)

Matt
 
Last edited:

Boobala

Lawn Pro
Joined
Feb 15, 2015
Threads
200
Messages
7,000
Nice pics Matt ... moving right along !! ..:thumbsup:
 

mattm55

Active Member
Joined
Mar 6, 2017
Threads
3
Messages
81
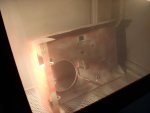
So the last of the larger pieces and luckily the front and rear both fit into the blast cabinet. That just makes paint prep easier. Time for more assembly. Stay tuned....


DSCN2770.jpg

Matt
 

mattm55

Active Member
Joined
Mar 6, 2017
Threads
3
Messages
81
While starting to assemble the Snapper's rear axle I came across a couple of things I have to repair now. Pictures forthcoming...

  1. Rear Axle End Play: After getting both of the fenders attached temporarily, I have noticed the usual end play with the axle. I have a few of the nylon spacers but have a gap a little over 1/4". The next step is to take some aluminum round stock I have and make a spacer. Once complete, I'll post pics.
  2. Yoke Play: Upon putting the yoke back on I noticed that one of the holes on the case was out of round. Quite a bit of play for the nylon bushing. I should have seen this before but I missed it. So that will take some thinking on the best way to repair. I don't want to let it go as this will effect the drive disk to clutch effectiveness. I've gone this far... why not. My first idea is to round the hole out with a step drill and then tig weld a zinc washer in the hole and then grind and redrill to the correct size. Maybe another idea. One good thing is putting all the tools to use.... ;o)

    *I see I wasn't the only one with this issue. I haven't found any other references using G**GLE for it either.

    http://www.lawnmowerforum.com/showthread.php/11777-Snapper-rear-engine-rider-yoke-bearing-fix?highlight=yoke+play

Matt
 

mattm55

Active Member
Joined
Mar 6, 2017
Threads
3
Messages
81
  1. Rear Axle End Play: After getting both of the fenders attached temporarily, I have noticed the usual end play with the axle. I have a few of the nylon spacers but have a gap a little over 1/4". The next step is to take some aluminum round stock I have and make a spacer. Once complete, I'll post pics.

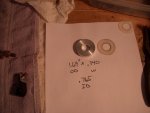
Here is my rear axle spacer from a piece of aluminum round stock I had turned on a Grizzly G0602 variable speed lathe. I wanted to create a spacer thick enough so I could remove the nylon spacers for the initial build. As everything wears, I'll have the nylon spacers to put back in.

DSCN2779.jpg

DSCN2780.jpg


Progress... now I have to see about welding up the yoke mount next.

Matt
 
Top