I answered your other post before I found this one. Here is what I said over there:
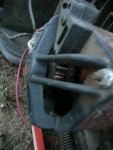
From the Black and Decker website, not really sure what the difference between the mowers are but I included all 3 type instructions. Seems that you have not aligned the flats in the blade hole with the flats on the shaft.
Type 1 mower
1. RELEASE SWITCH LEVER TO TURN MOWER OFF, WAIT FOR THE BLADE TO
STOP, AND UNPLUG MOWER!
2. Use a piece of 2x4 wood (about 2 feet long) to keep blade from turning while
removing blade nut.
3. Wear gloves. Position wood and remove nut as shown in Figure 9.
4. Remove lower blade spacer, lower insulator washer and blade. (Figure 10)
5. When replacing sharpened or new blade on shoulder of fan, make sure the
GRASS SIDE identification on the blade is facing the ground. Place lower
insulator washer over shoulder of the fan. Now place lower blade spacer and
the blade nut on the shaft.
NOTE: Align flats of shaft with flats in lower insulator washer and lower the blade
space. Position wood to keep shaft from turning (Figure 11) and then
securely tighten blade nut.
Type 2 mower:
REMOVING AND INSTALLING BLADE (FIGURE 9,10,11)
1. RELEASE SWITCH LEVER TO TURN MOWER OFF, WAIT FOR
THE BLADE TO STOP, AND UNPLUG MOWER. THEN TURN
THE MOWER OVER FOR ACCESS TO THE BLADE.
2. Use a piece of 2x4 wood (about 2 feet long) to keep blade from
turning while removing flange nut.
3. Wear gloves and proper eye protection. Be careful of sharp edges of
blade. Position wood and remove flange nut as shown in
Figure 9.
4. Remove square metal blade spacer, square plastic blade insulator,
and blade (Figure 10). Examine blade insulator for damage and
replace if necessary.
5. When replacing sharpened or new blade on shoulder of fan, make
sure the GRASS SIDE on the blade will be facing the ground when
the mower is returned to its normal upright position. After installing
blade, place blade insulator on blade such that the raised lips on
one side engage the edges of the blade. Then install the blade
spacer so that it sits inside the raised lips on the other side of the
blade insulator. Be sure to align the flats in the hole of the blade
spacer with the flats of the shaft, rotating the blade and blade
insulator together as necessary. Position piece of wood to keep
blade from turning (Figure 11). Install flange nut with the flange
against the blade spacer and securely tighten.
Type 3 mower:
REMOVING AND INSTALLING BLADE (FIGURE 9,10,11)
1. RELEASE SWITCH LEVER TO TURN MOWER OFF, WAIT FOR
THE BLADE TO STOP, AND UNPLUG MOWER. THEN TURN
THE MOWER OVER FOR ACCESS TO THE BLADE.
2. Use a piece of 2x4 wood (about 2 feet long) to keep blade from
turning while removing flange nut.
3. Wear gloves and proper eye protection. Be careful of sharp edges of
blade. Position wood and remove flange nut as shown in
Figure 9.
4. Remove square metal blade spacer, square plastic blade insulator,
and blade (Figure 10). Examine blade insulator for damage and
replace if necessary.
5. When replacing sharpened or new blade on shoulder of fan, make
sure the GRASS SIDE on the blade will be facing the ground when
the mower is returned to its normal upright position. After installing
blade, place blade insulator on blade such that the raised lips on
one side engage the edges of the blade. Then install the blade
spacer so that it sits inside the raised lips on the other side of the
blade insulator. Be sure to align the flats in the hole of the blade
spacer with the flats of the shaft, rotating the blade and blade
insulator together as necessary. Position piece of wood to keep
blade from turning (Figure 11). Install flange nut with the flange
against the blade spacer and securely tighten.
Hope this helps
Tom